Dulcey Cinnamon Cake with Pomegranate Buttercream by Molly Brodak

Screen+Shot+2019-09-15+at+5.56.45+PM.jpg

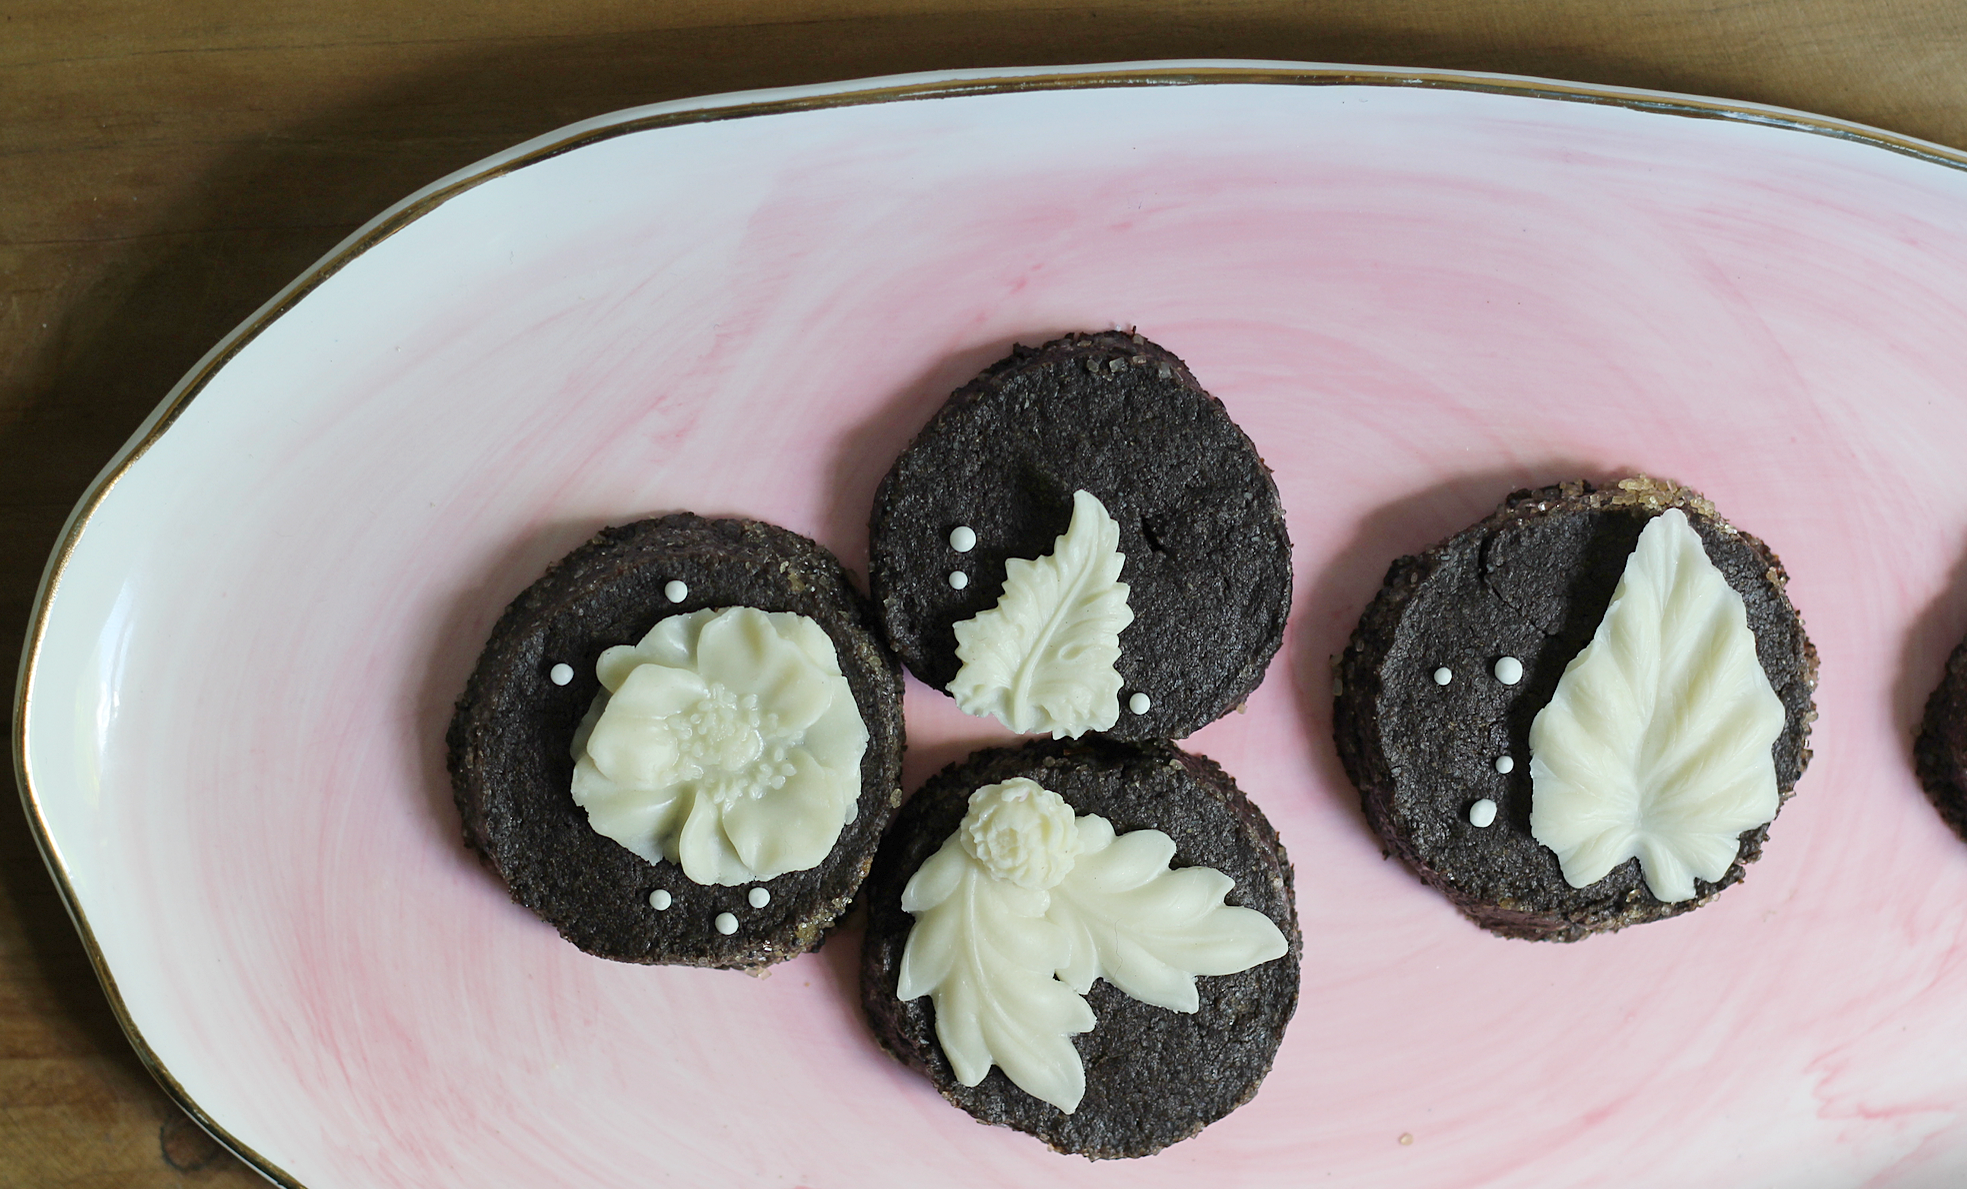
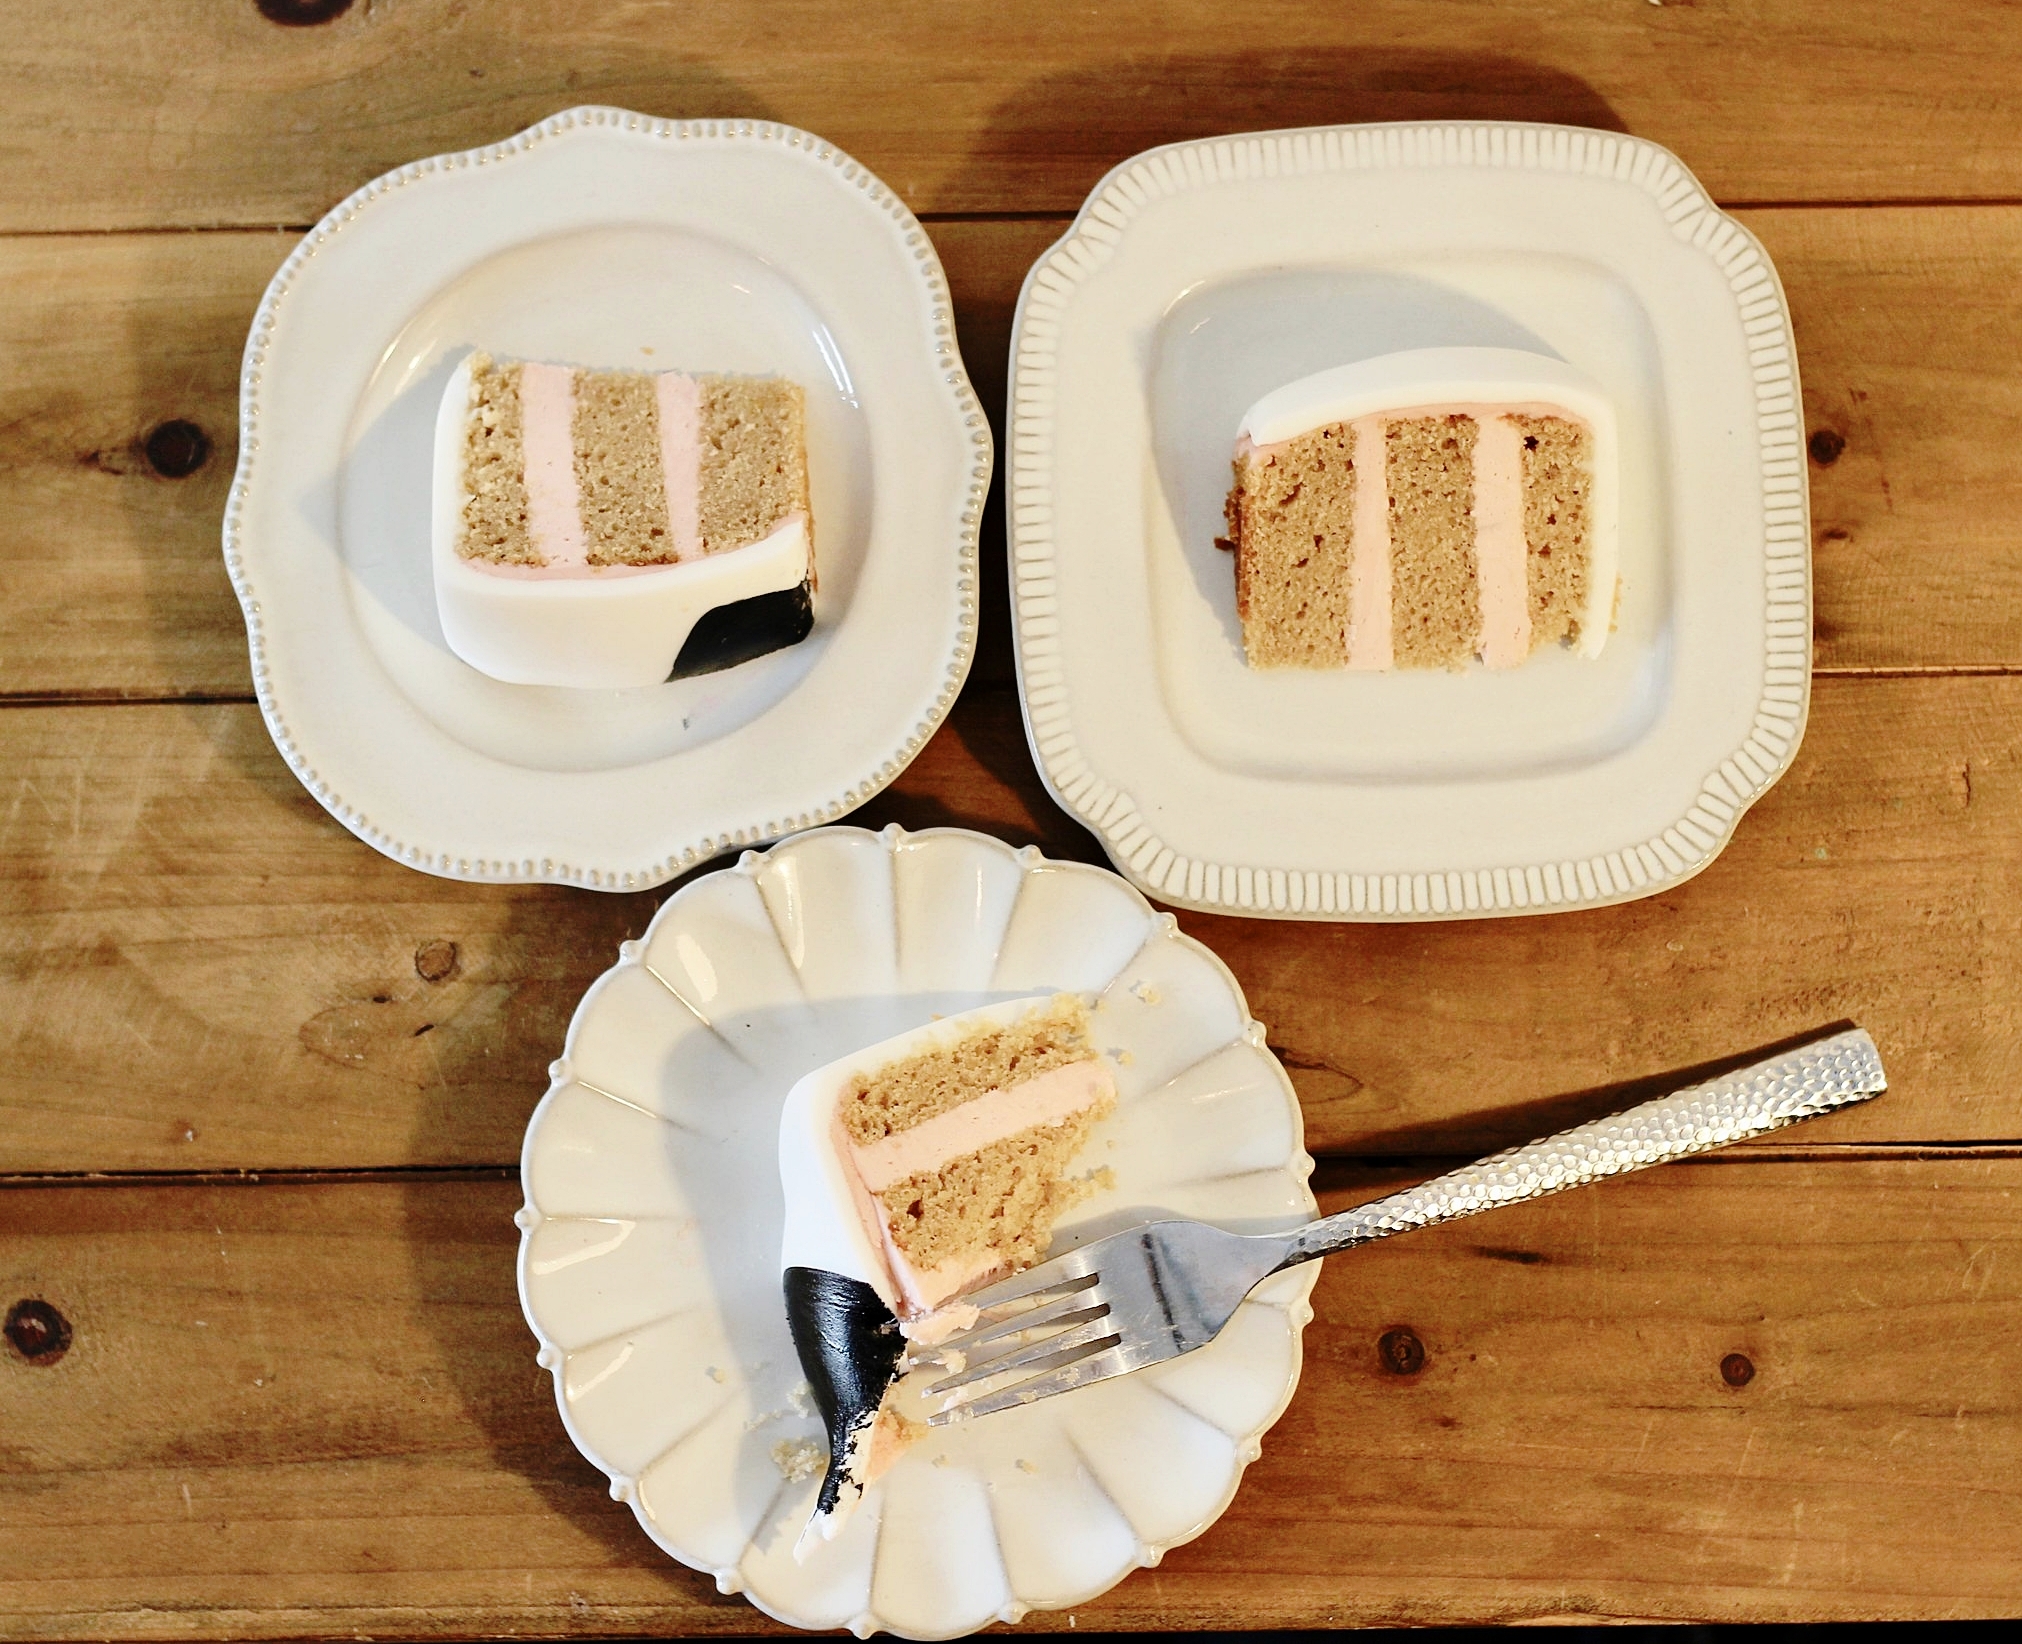
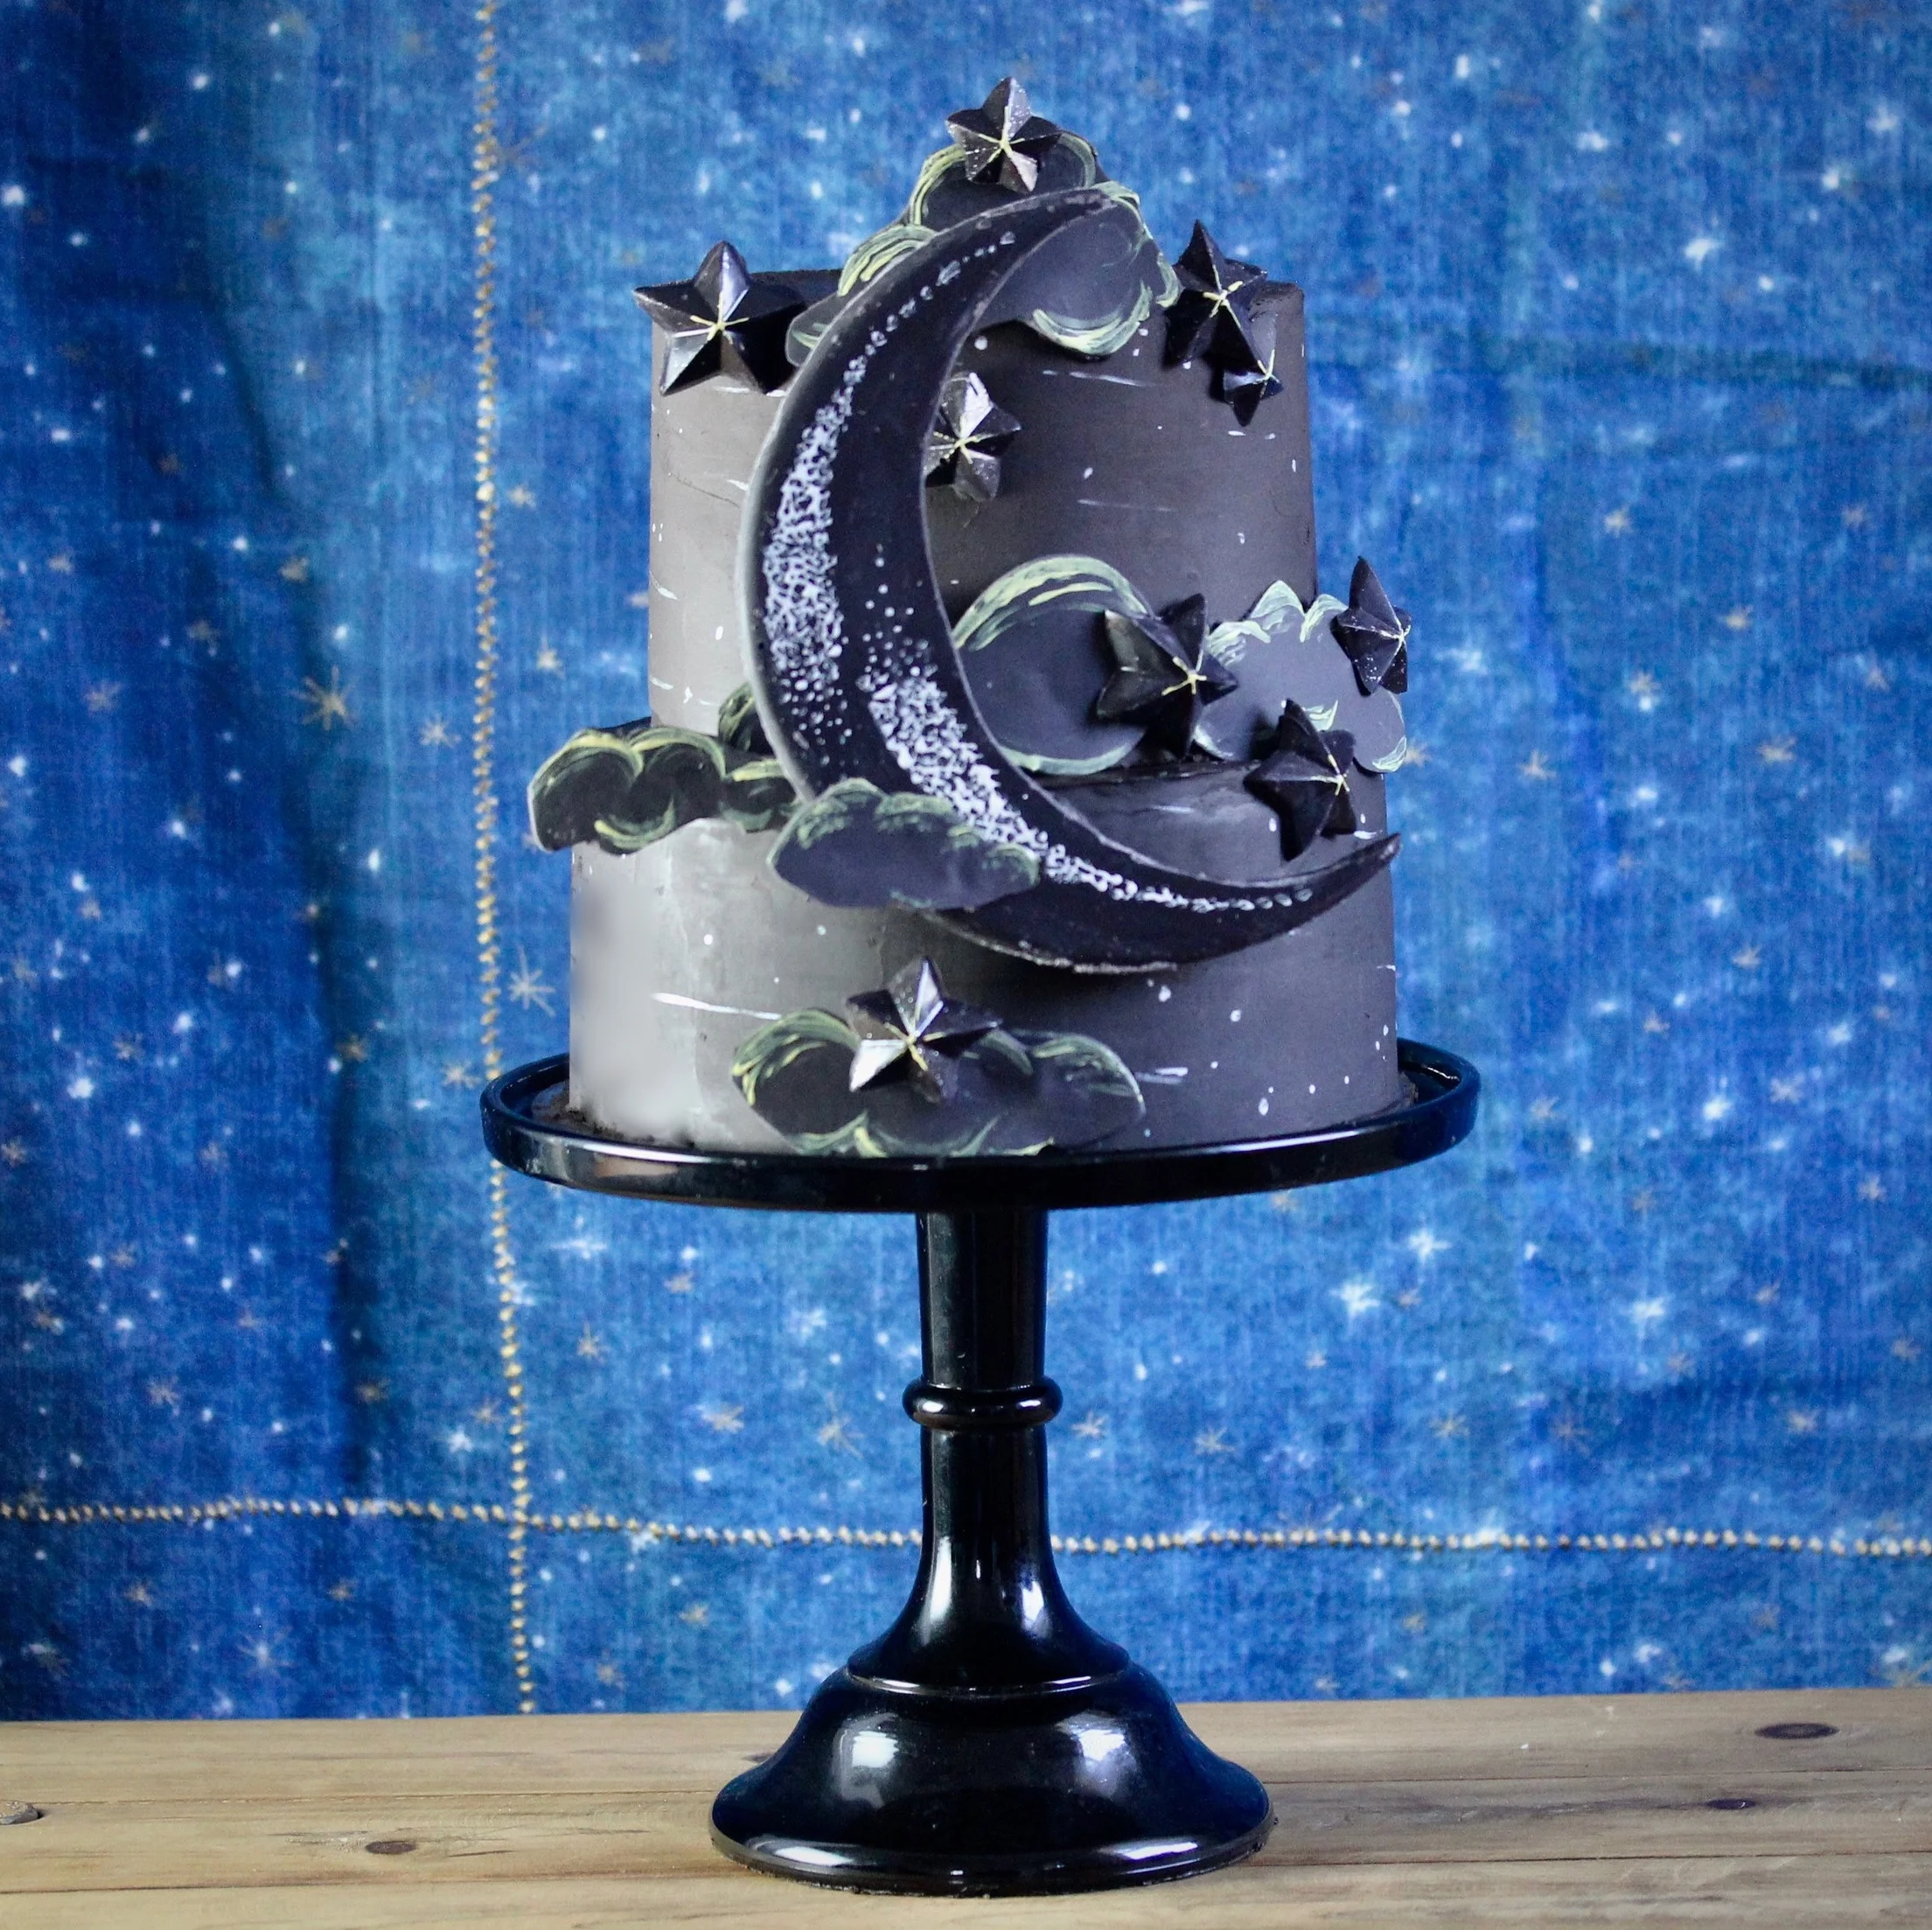
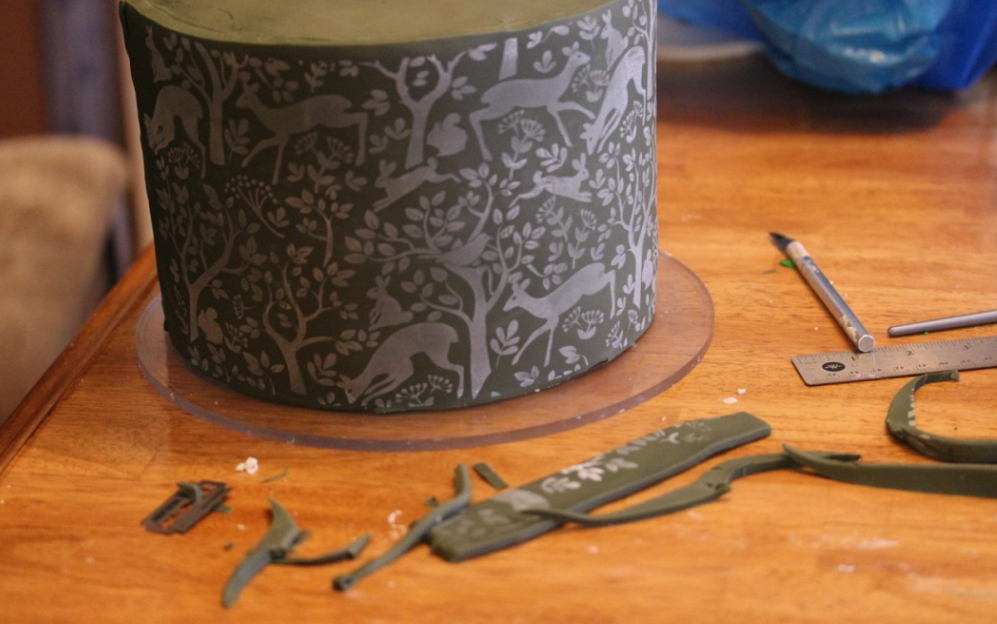
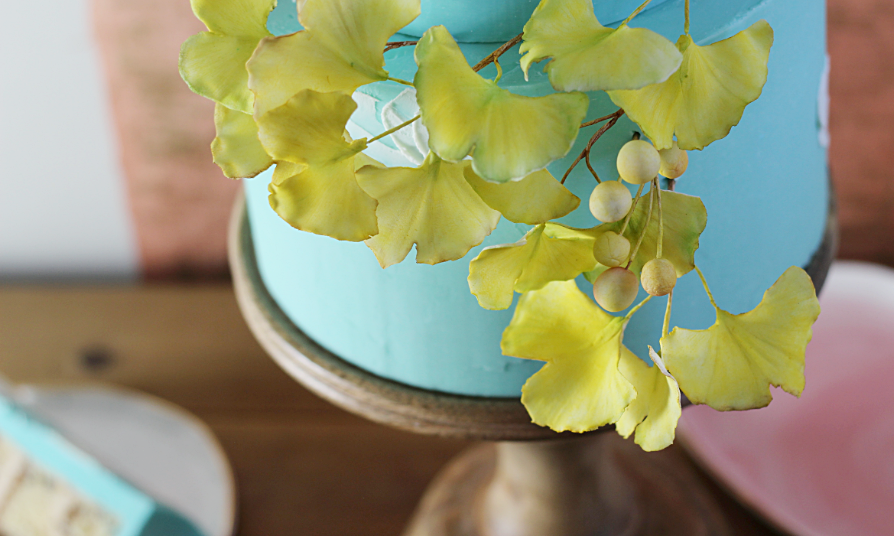
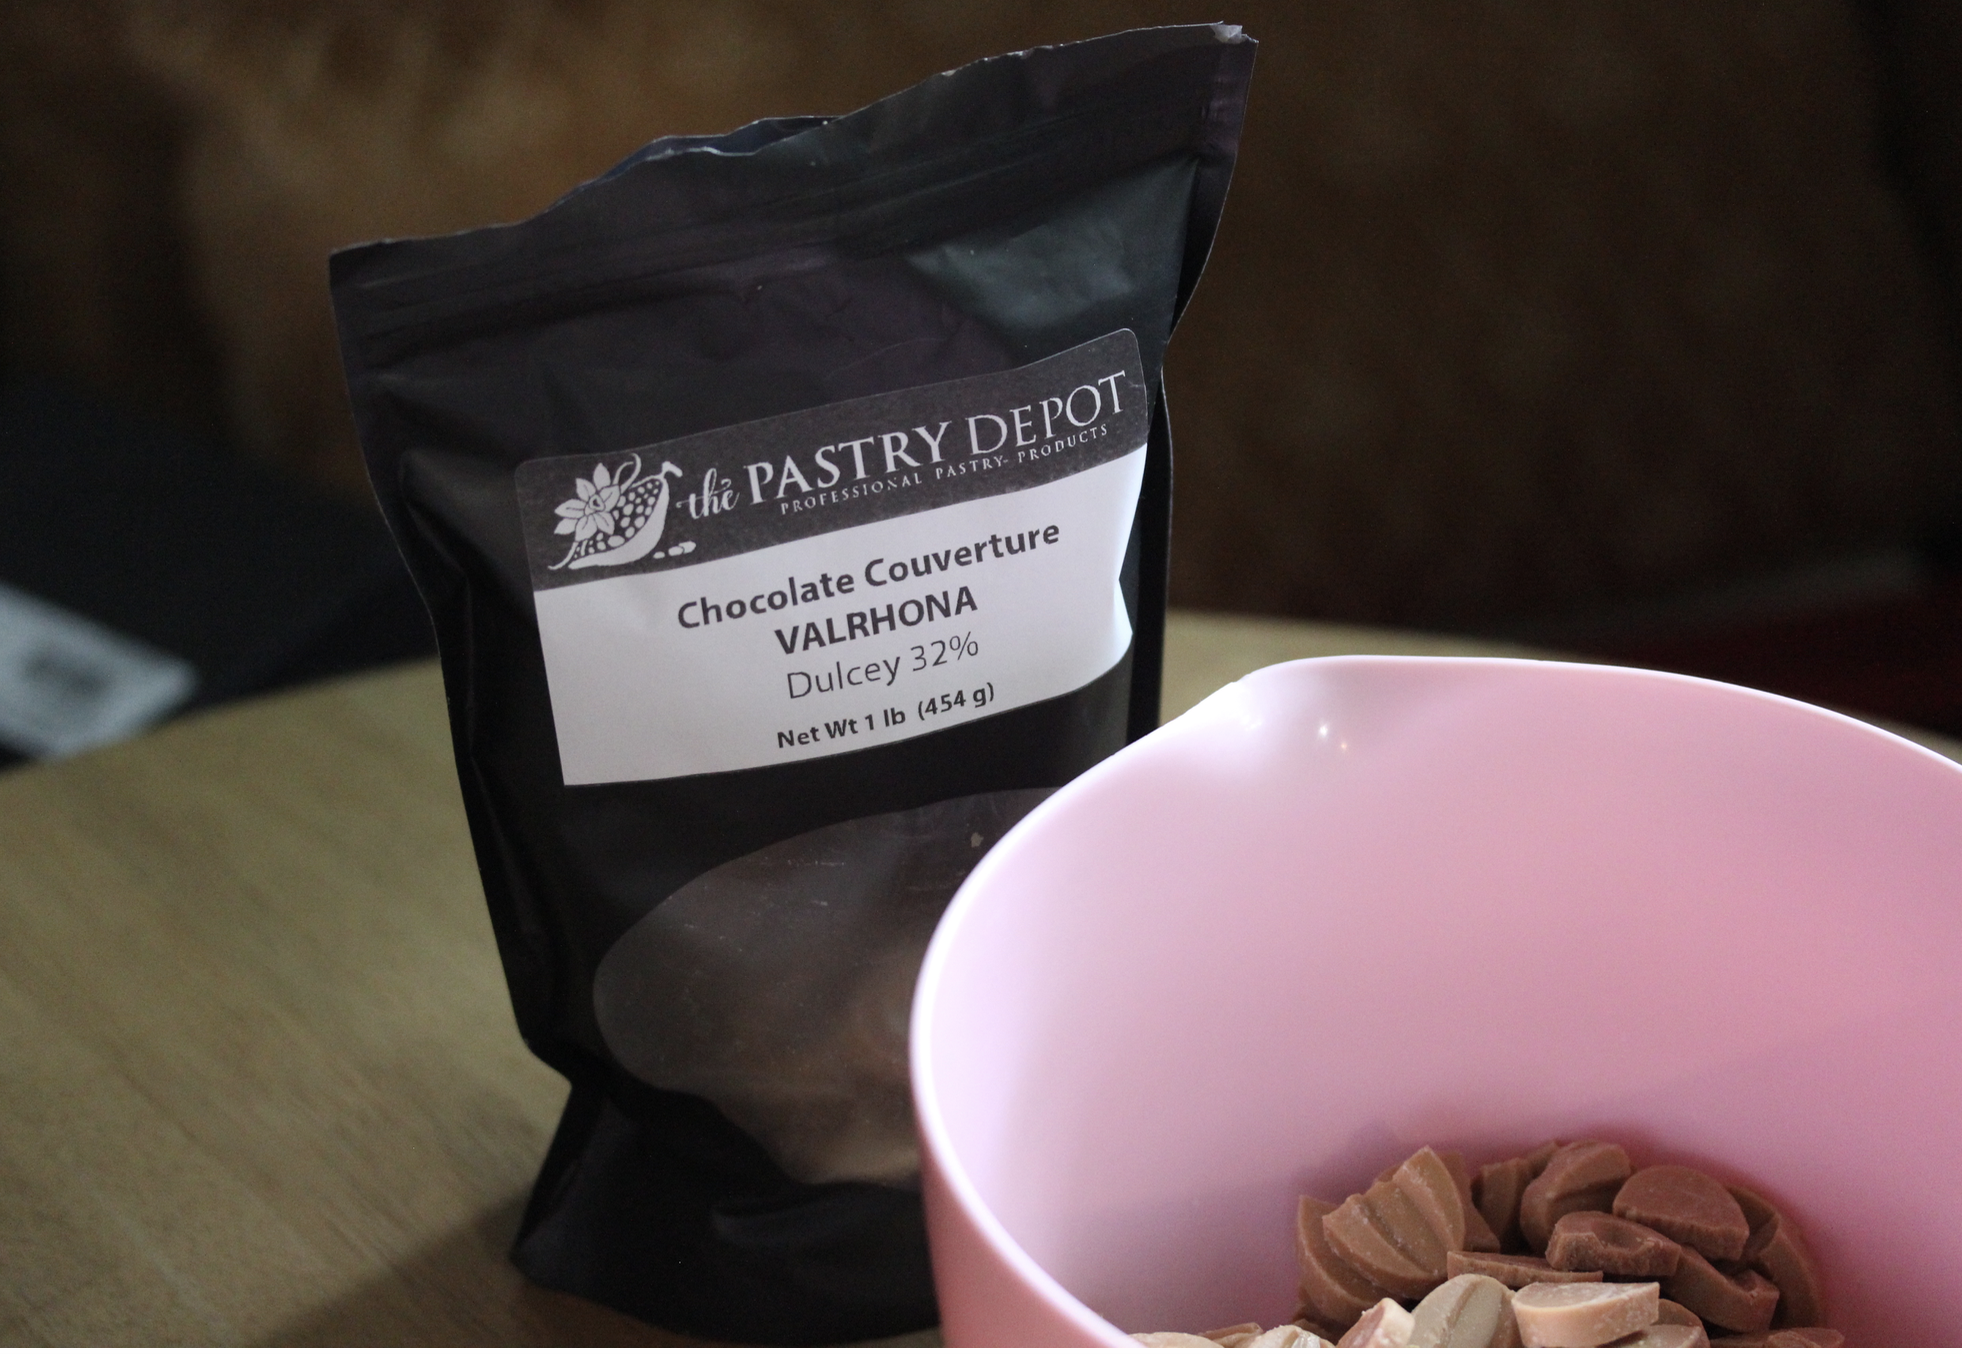
It’s as if all the bittersweetness of late summer turning to early fall reduced down into this one little edible point: a super moist, comforting cinnamon cake with a lightly tart pomegranate Italian meringue buttercream and a layer of sweet dulcey ganache. I finished the cake with a hand-painted pattern inspired by folk print fabric using edible paints that compliments the almost pottery-like natural color variations in the dulcey ganache. I wrote this recipe, to be honest, as a way of figuring out what to do with dulcey chocolate, which is such an interesting flavor—far easier to eat than white chocolate with its slightly salty toasted butter notes, more akin to a dulce de leche taste than the caramel flavor one might assume it has from looking at it. It makes one of the most delicious ganaches I’ve ever had, so even if you are just in the mood to make this ganache and pour it into a tart shell and be done with dessert this post will be super useful to you.

Screen Shot 2019-09-15 at 6.01.51 PM.png

But this cake is really special, too.

The texture of this cake is quite different from my velvety white cream cake. This is a rustic, dense, and crazy-moist cinnamon cake organized around the trifecta of moistening ingredients: apple sauce, brown sugar, and sour cream. You can make it a true spice cake by adding whatever spices you’d like, but I love the pure focus of comforting cinnamon here. The very light pomegranate buttercream is easy to make, using store-bought juice, and offers the perfect foil for Valrhona’s sweet and toasty dulcey chocolate.

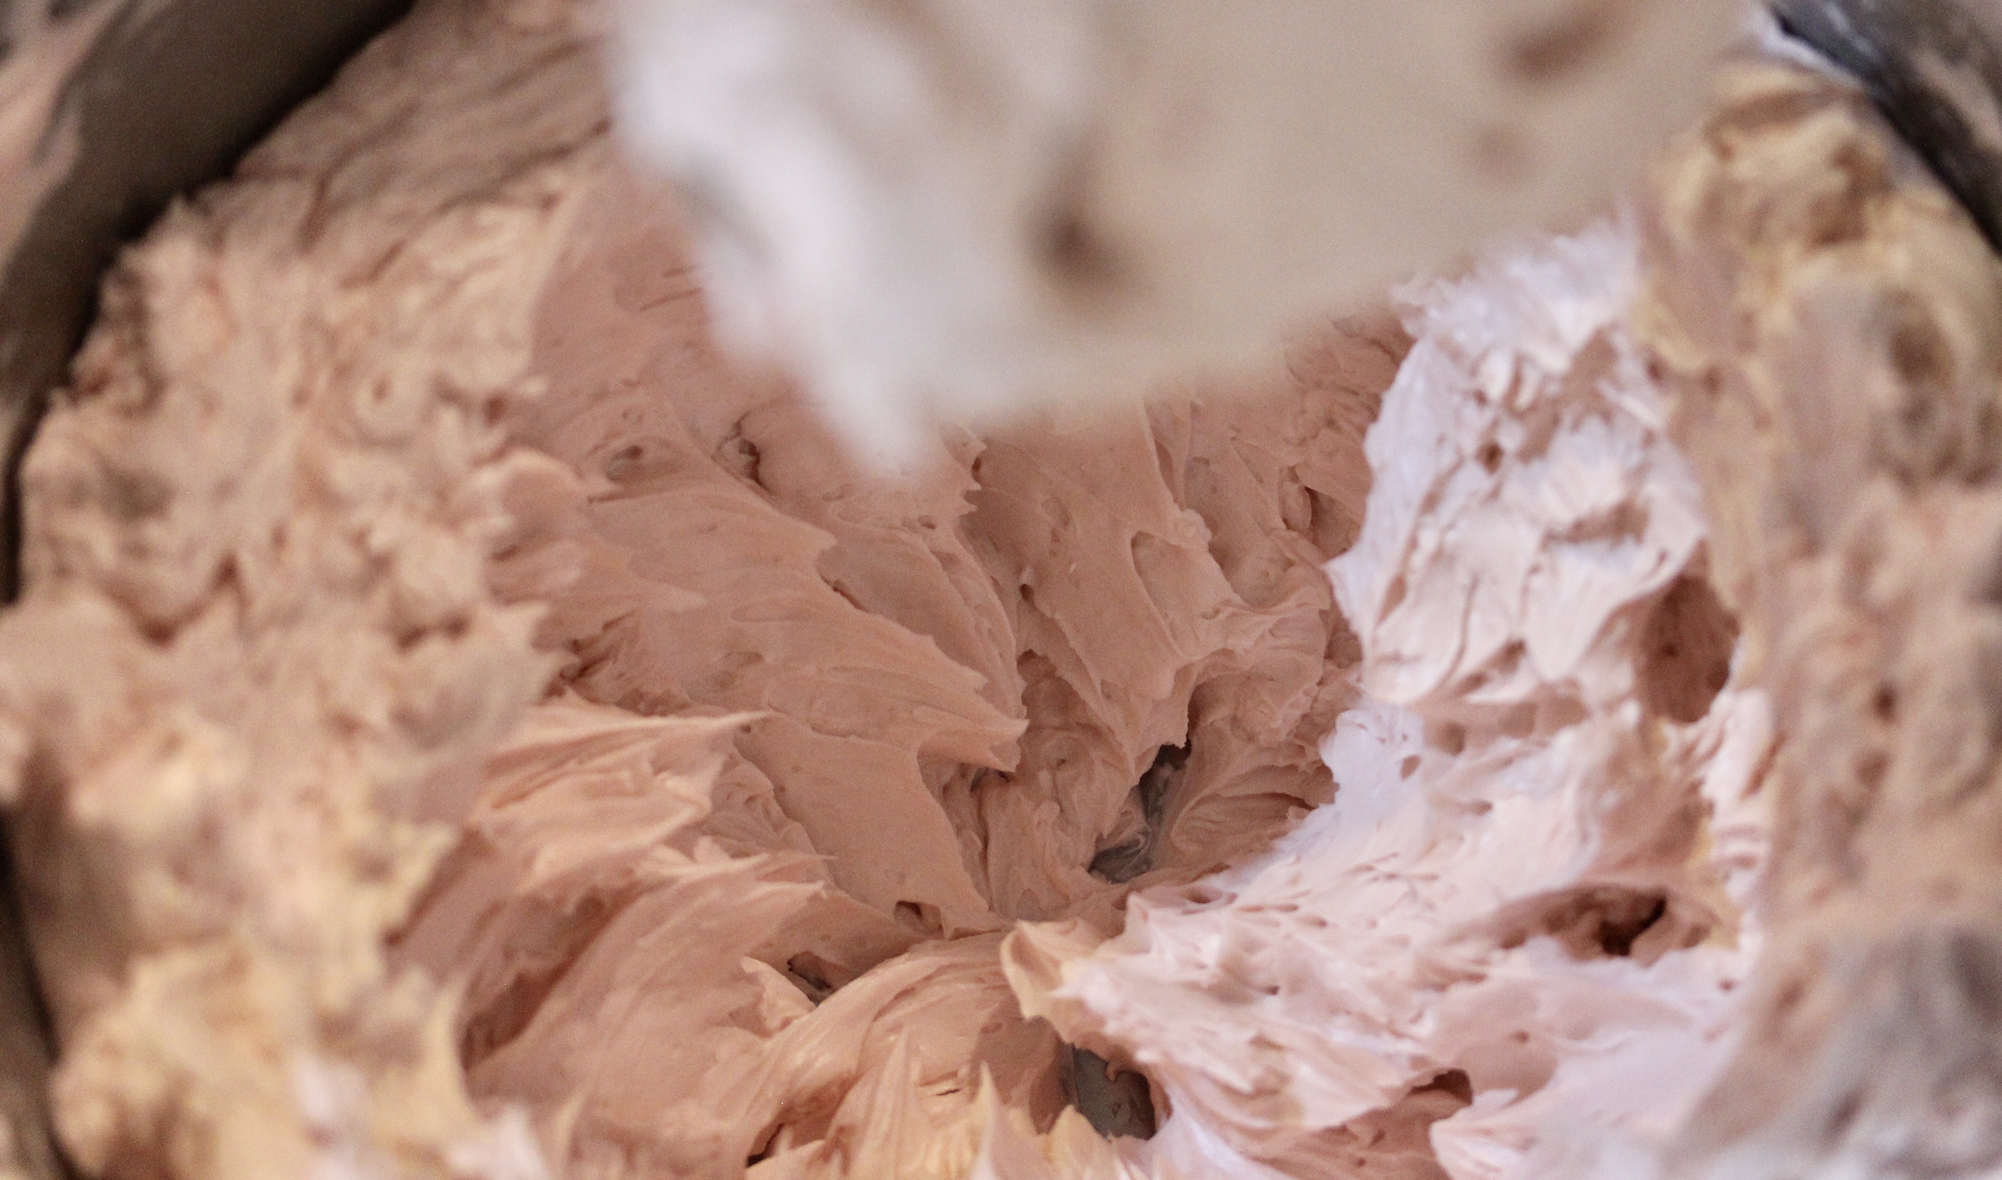
So let’s start with the buttercream. It seems like in the past year I’ve been completely overtaken with this Italian meringue buttercream recipe, which I used to think was so fussy and not worth it—not anymore. Now it seems so easy to me, and so much more delicious than any other buttercream. I’m not big on sharing recipes that you need to have a stand mixer for, but this is one of the exceptions. My recipe for Italian meringue buttercream (IMBC) is very standard, but my method of putting it together is not. It’s kind of a ‘reverse’ of the traditional (and, in my opinion, problematic) method of adding butter to the meringue which often causes all kinds of problems that make IMBC seem stressful. First of all, there’s a somewhat challenging issue of temperature control, which I have learned from years of experience writing recipes now, is always a sticking point. Ambient conditions are difficult to control in a home kitchen, and judgments about what is ‘room temperature’ and what is ‘cool’ or ‘warm’ are always subjective and can lead to despair. This ‘reverse’ method, hopefully, avoids us some despair.

Screen Shot 2019-09-15 at 5.53.40 PM.png

So this is my basic IMBC recipe, to which you can add any flavors or adjust the sweetness in any way you’d like. Replacing the pomegranate juice with plain water in your sugar syrup will give you a blank canvas to play with. As you can see, I add a bit of powdered sugar to my butter in this recipe, which not everyone does, but I have found that people (especially here in the South) like a sweeter buttercream than standard IMBC and the touch of starch from the powdered sugar adds a bit of density to this otherwise very ethereal frosting that feels comforting and right to my clients. A half of a cup to a cup per pound of butter is just enough before you start to notice any grit in the frosting from the powdered sugar. Adjust to your taste. You can also add more sugar to your syrup to make it sweeter if you prefer.

I’ve written before about how illogical I found the process of IMBC to be in the past, adding a block of solid butter to meringue instead of the other way around, not to mention keeping the meringue in the hot mixer bowl and waiting around forever that way when it would cool almost instantly if you simply removed it. Then there’s that whole distressing ‘soup stage’ that IMBC can go through if your temps aren’t perfect, which is almost all of the time. This ‘reverse’ process should ensure that your buttercream never has to go through that painful soup stage—once the meringue is added to the butter it comes together smoothly and quickly.

I know it seems complex, but with the right tools really with IMBC all you’re doing is monitoring two machines to make sure they’re doing their jobs. You’re watching your thermometer and your mixer—and you don’t even have to watch your thermometer if you have one with an alarm (which I highly highly recommend!) This one is my all time favorite. You can just clip it, walk away, and wait for the beep.

IMBC is a fantastic canvas for any flavor, but does especially well with finely-ground freeze-dried fruit powder, which is an easy and natural way to flavor a frosting. I added a touch of pink food coloring, just FYI, to this batch since the pomegranate juice was not quite strong enough to color the icing pink as I hoped. IMBC is so, so much better for piping since it really holds its shape well and makes glossy, almost translucent flowers so if you wanted to skip the dulcey ganache altogether and just use this baby for the whole cake it wouldn’t be a bad choice at all.

ITALIAN MERINGUE BUTTERCREAM

1/4 c. and 1/4 cup of pomegranate juice, divided

6 oz. and 2 oz. sugar, divided

5 (150 g.) egg whites, cold

pinch cream of tartar

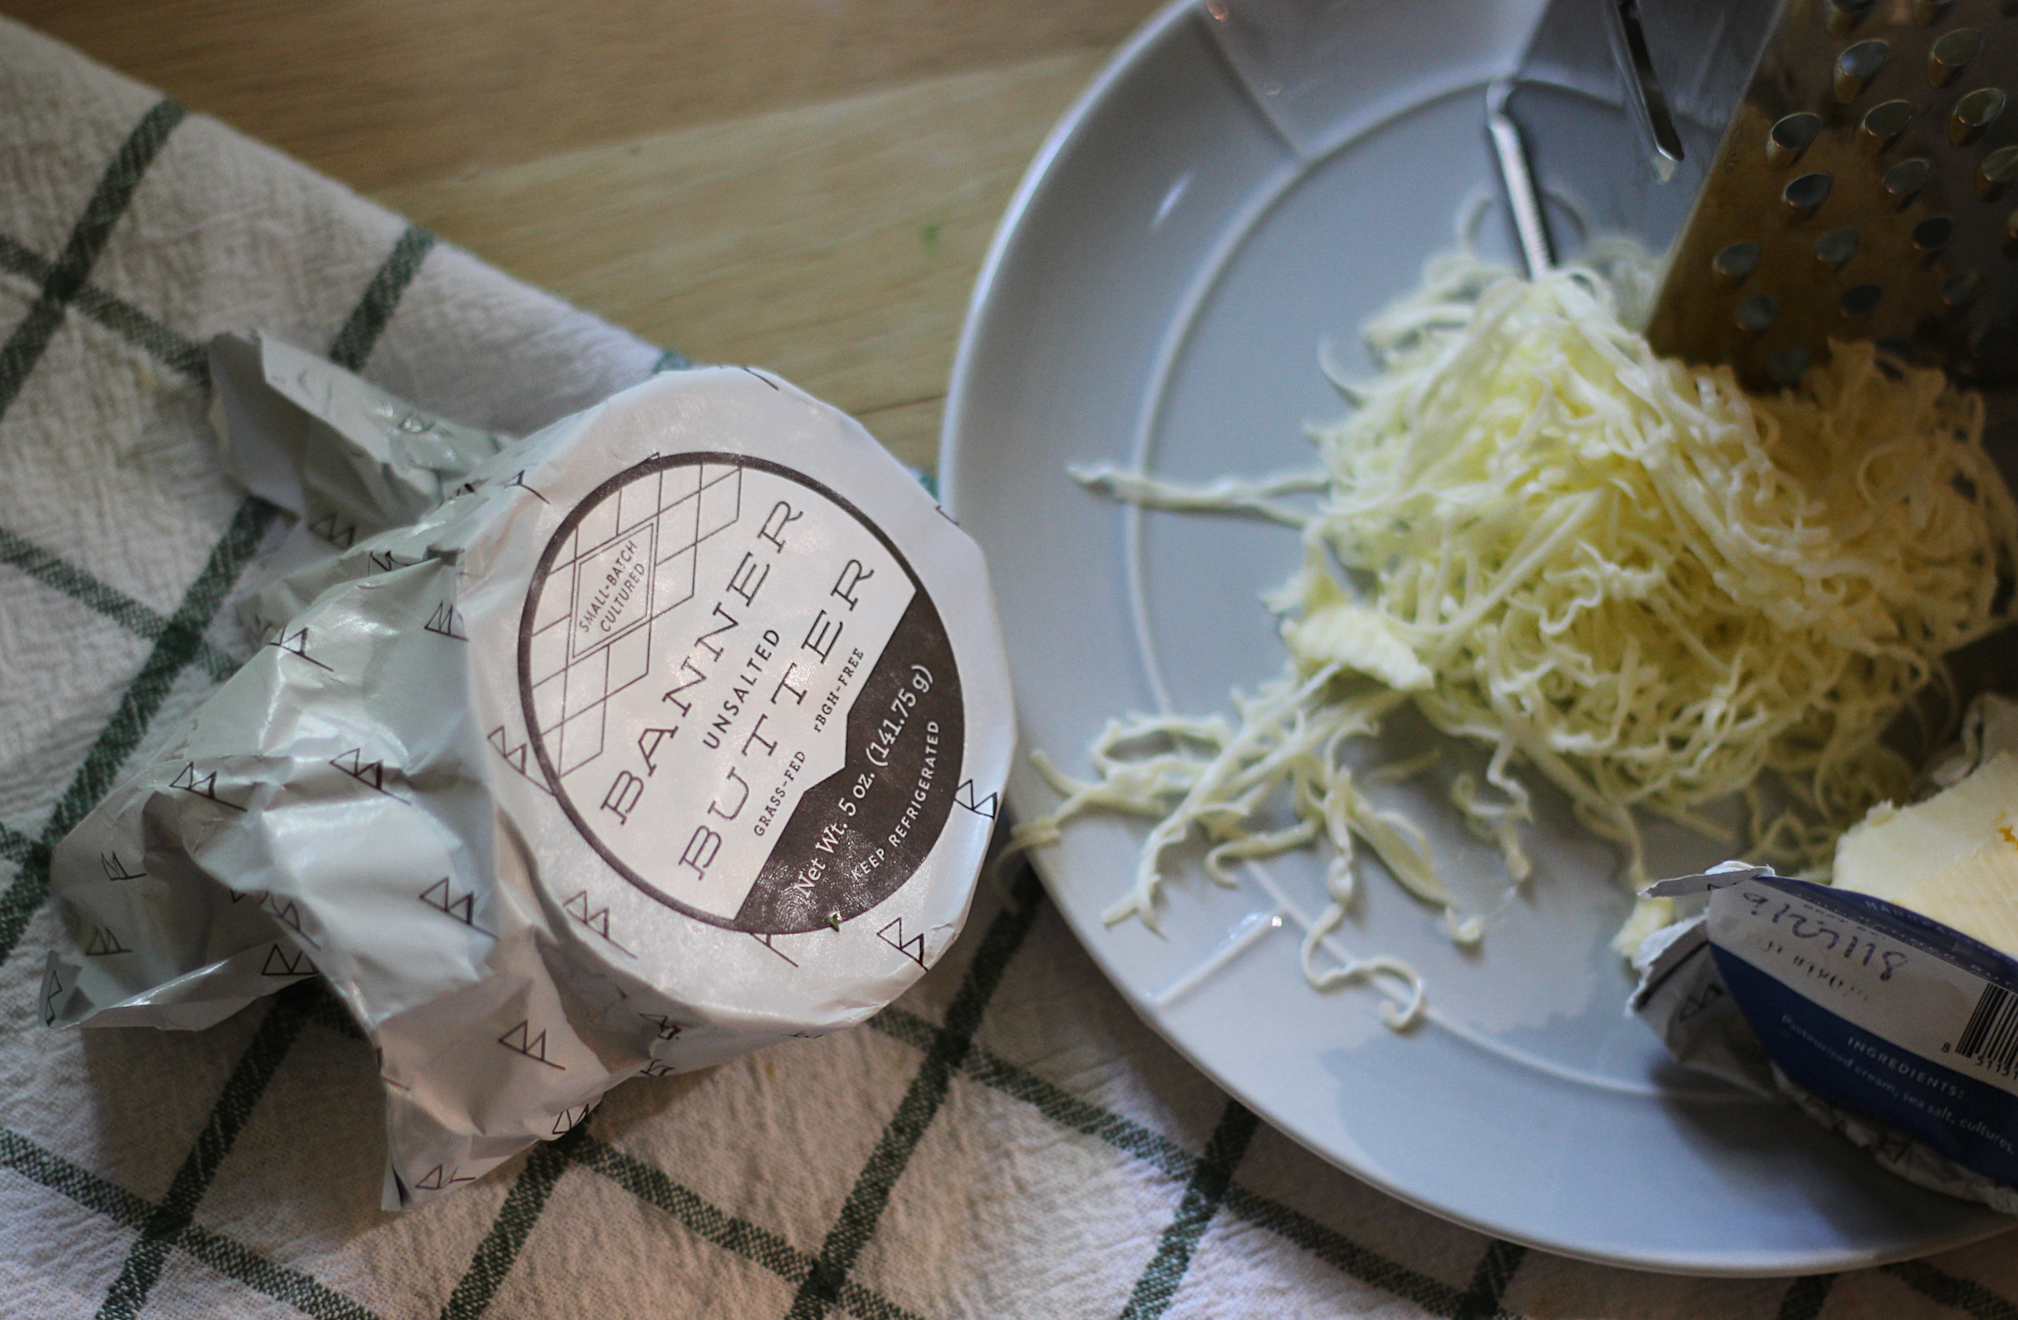
16 oz (453 g.) unsalted butter, softened

1/2 c. to 1 c. powdered sugar

pinch fine sea salt

pinch citric acid (optional, enhances flavor)

2 tsp. vanilla extract

white vinegar for wiping bowl

Degrease metal stand mixer bowl with a small amount of vinegar soaked into a paper towel. Separate eggs carefully and place whites and cream of tartar into bowl. Using whisk attachment, begin whipping eggs on low in a stand mixer.

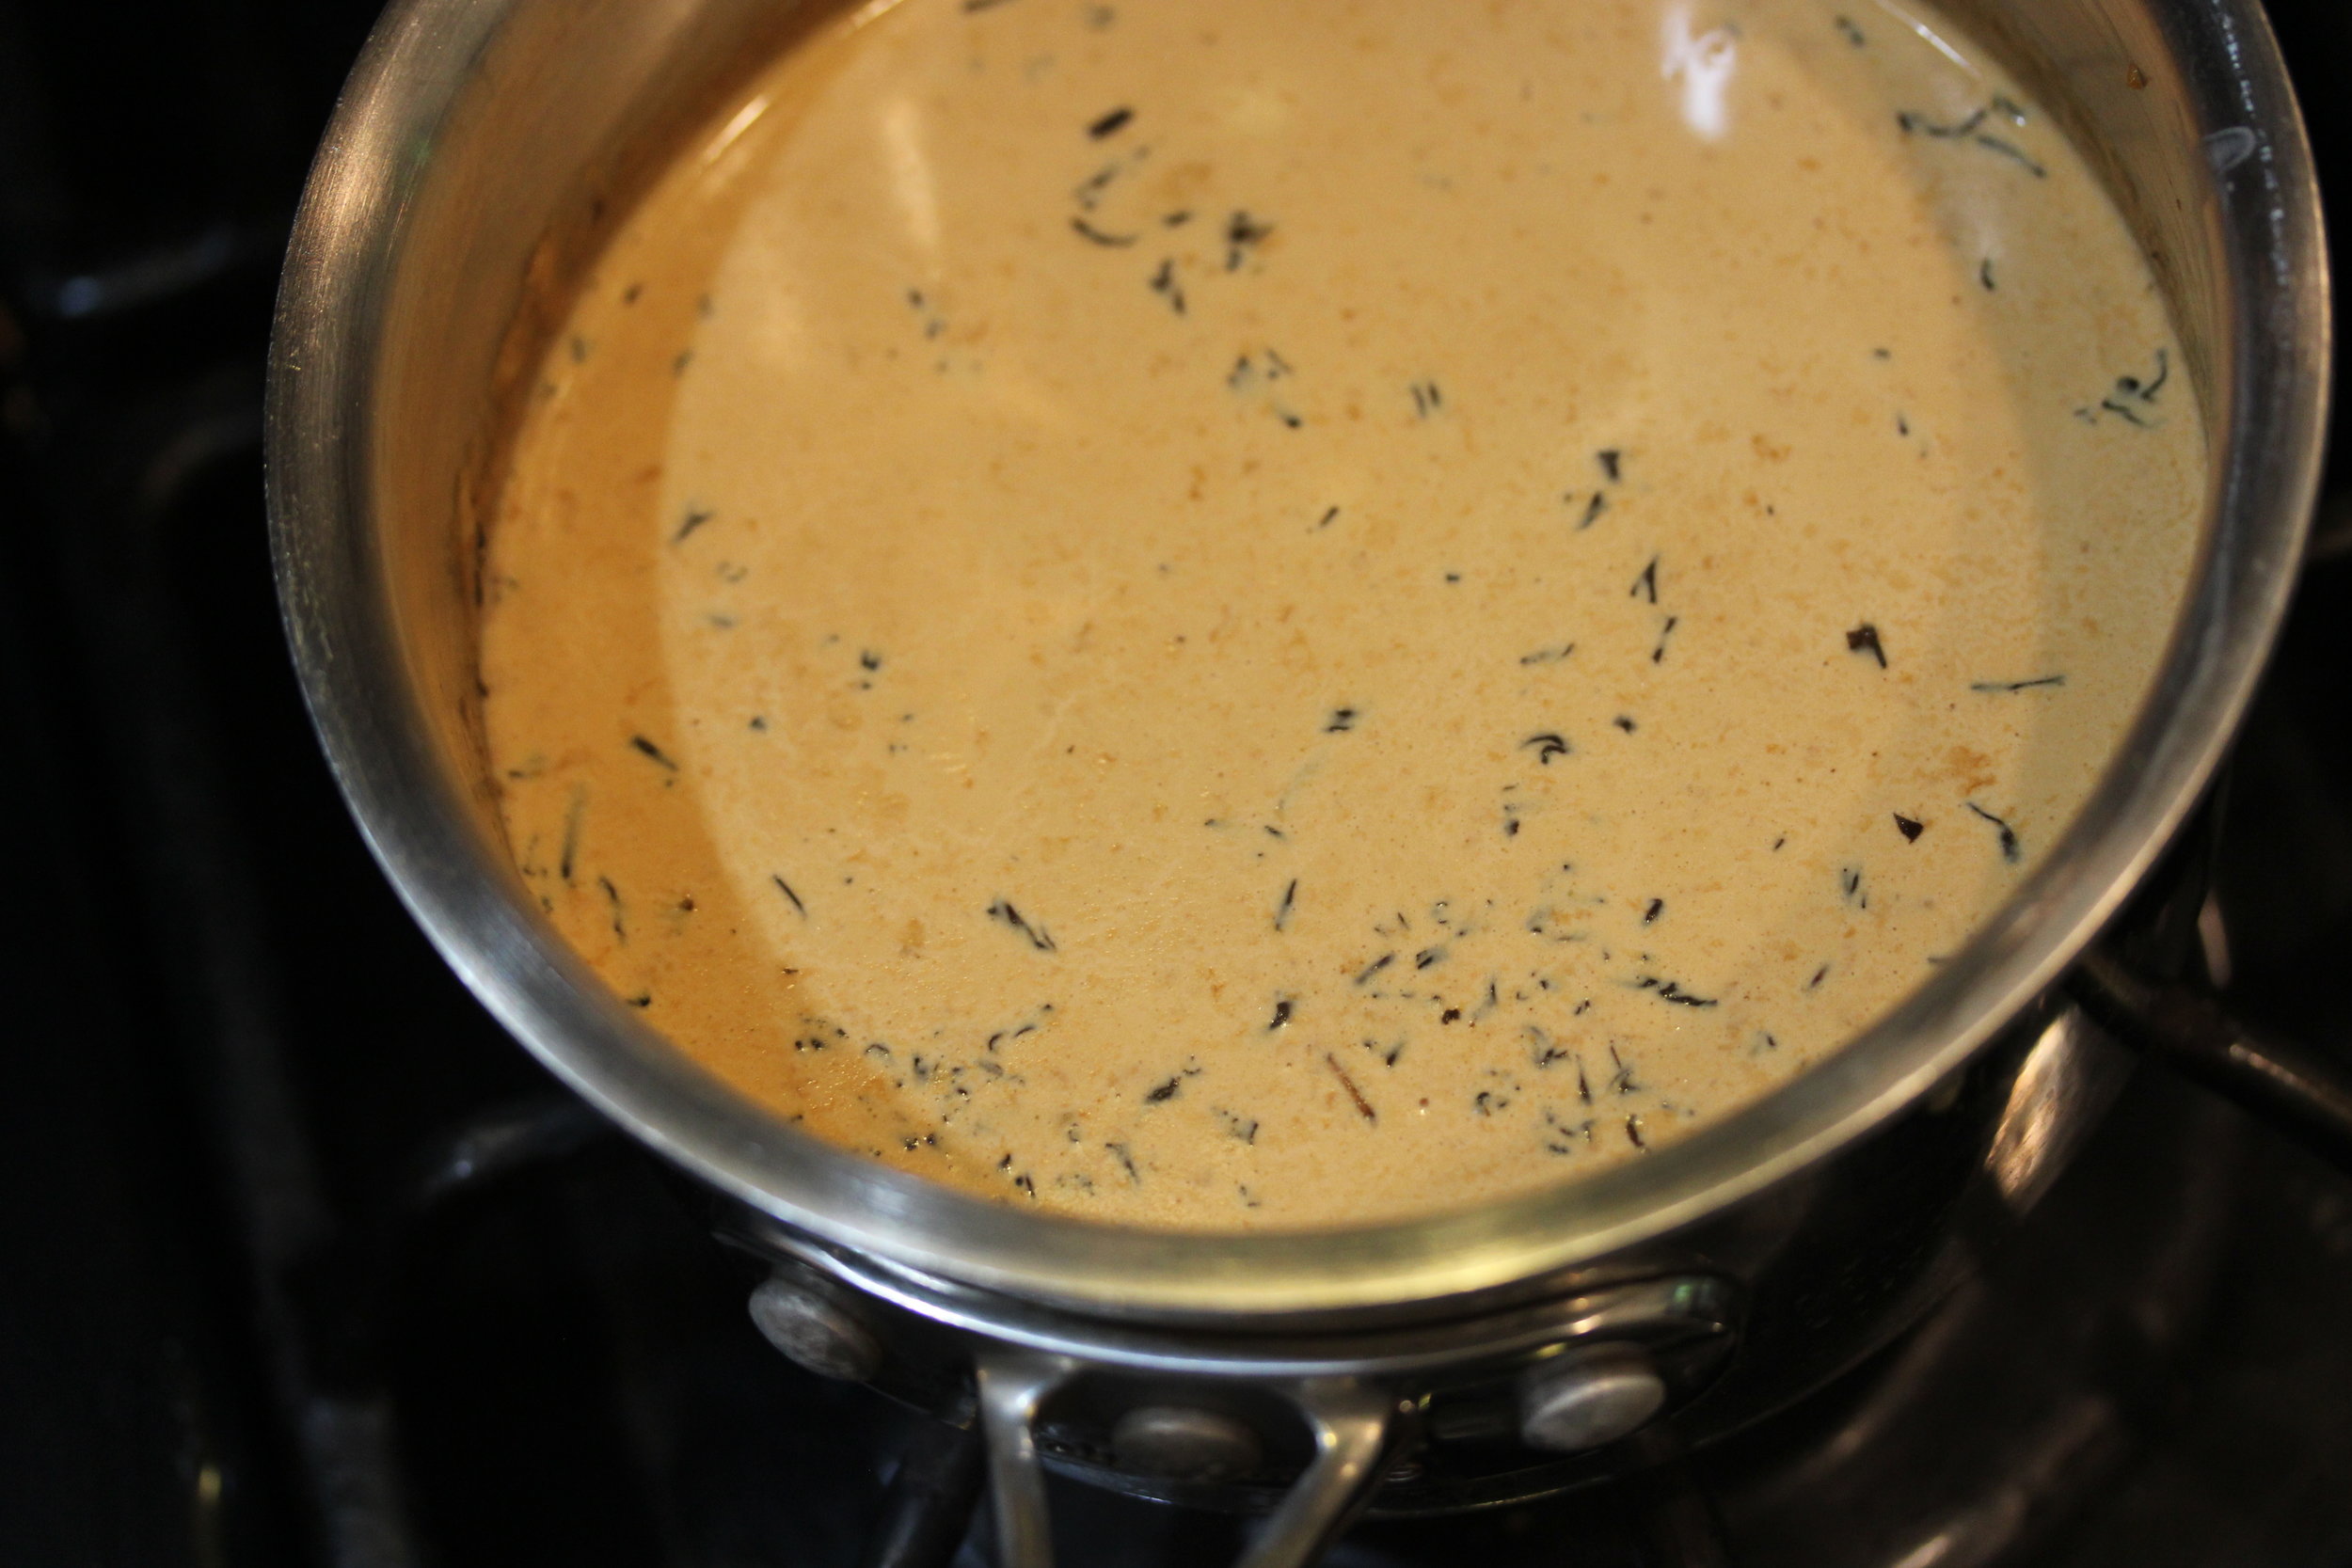
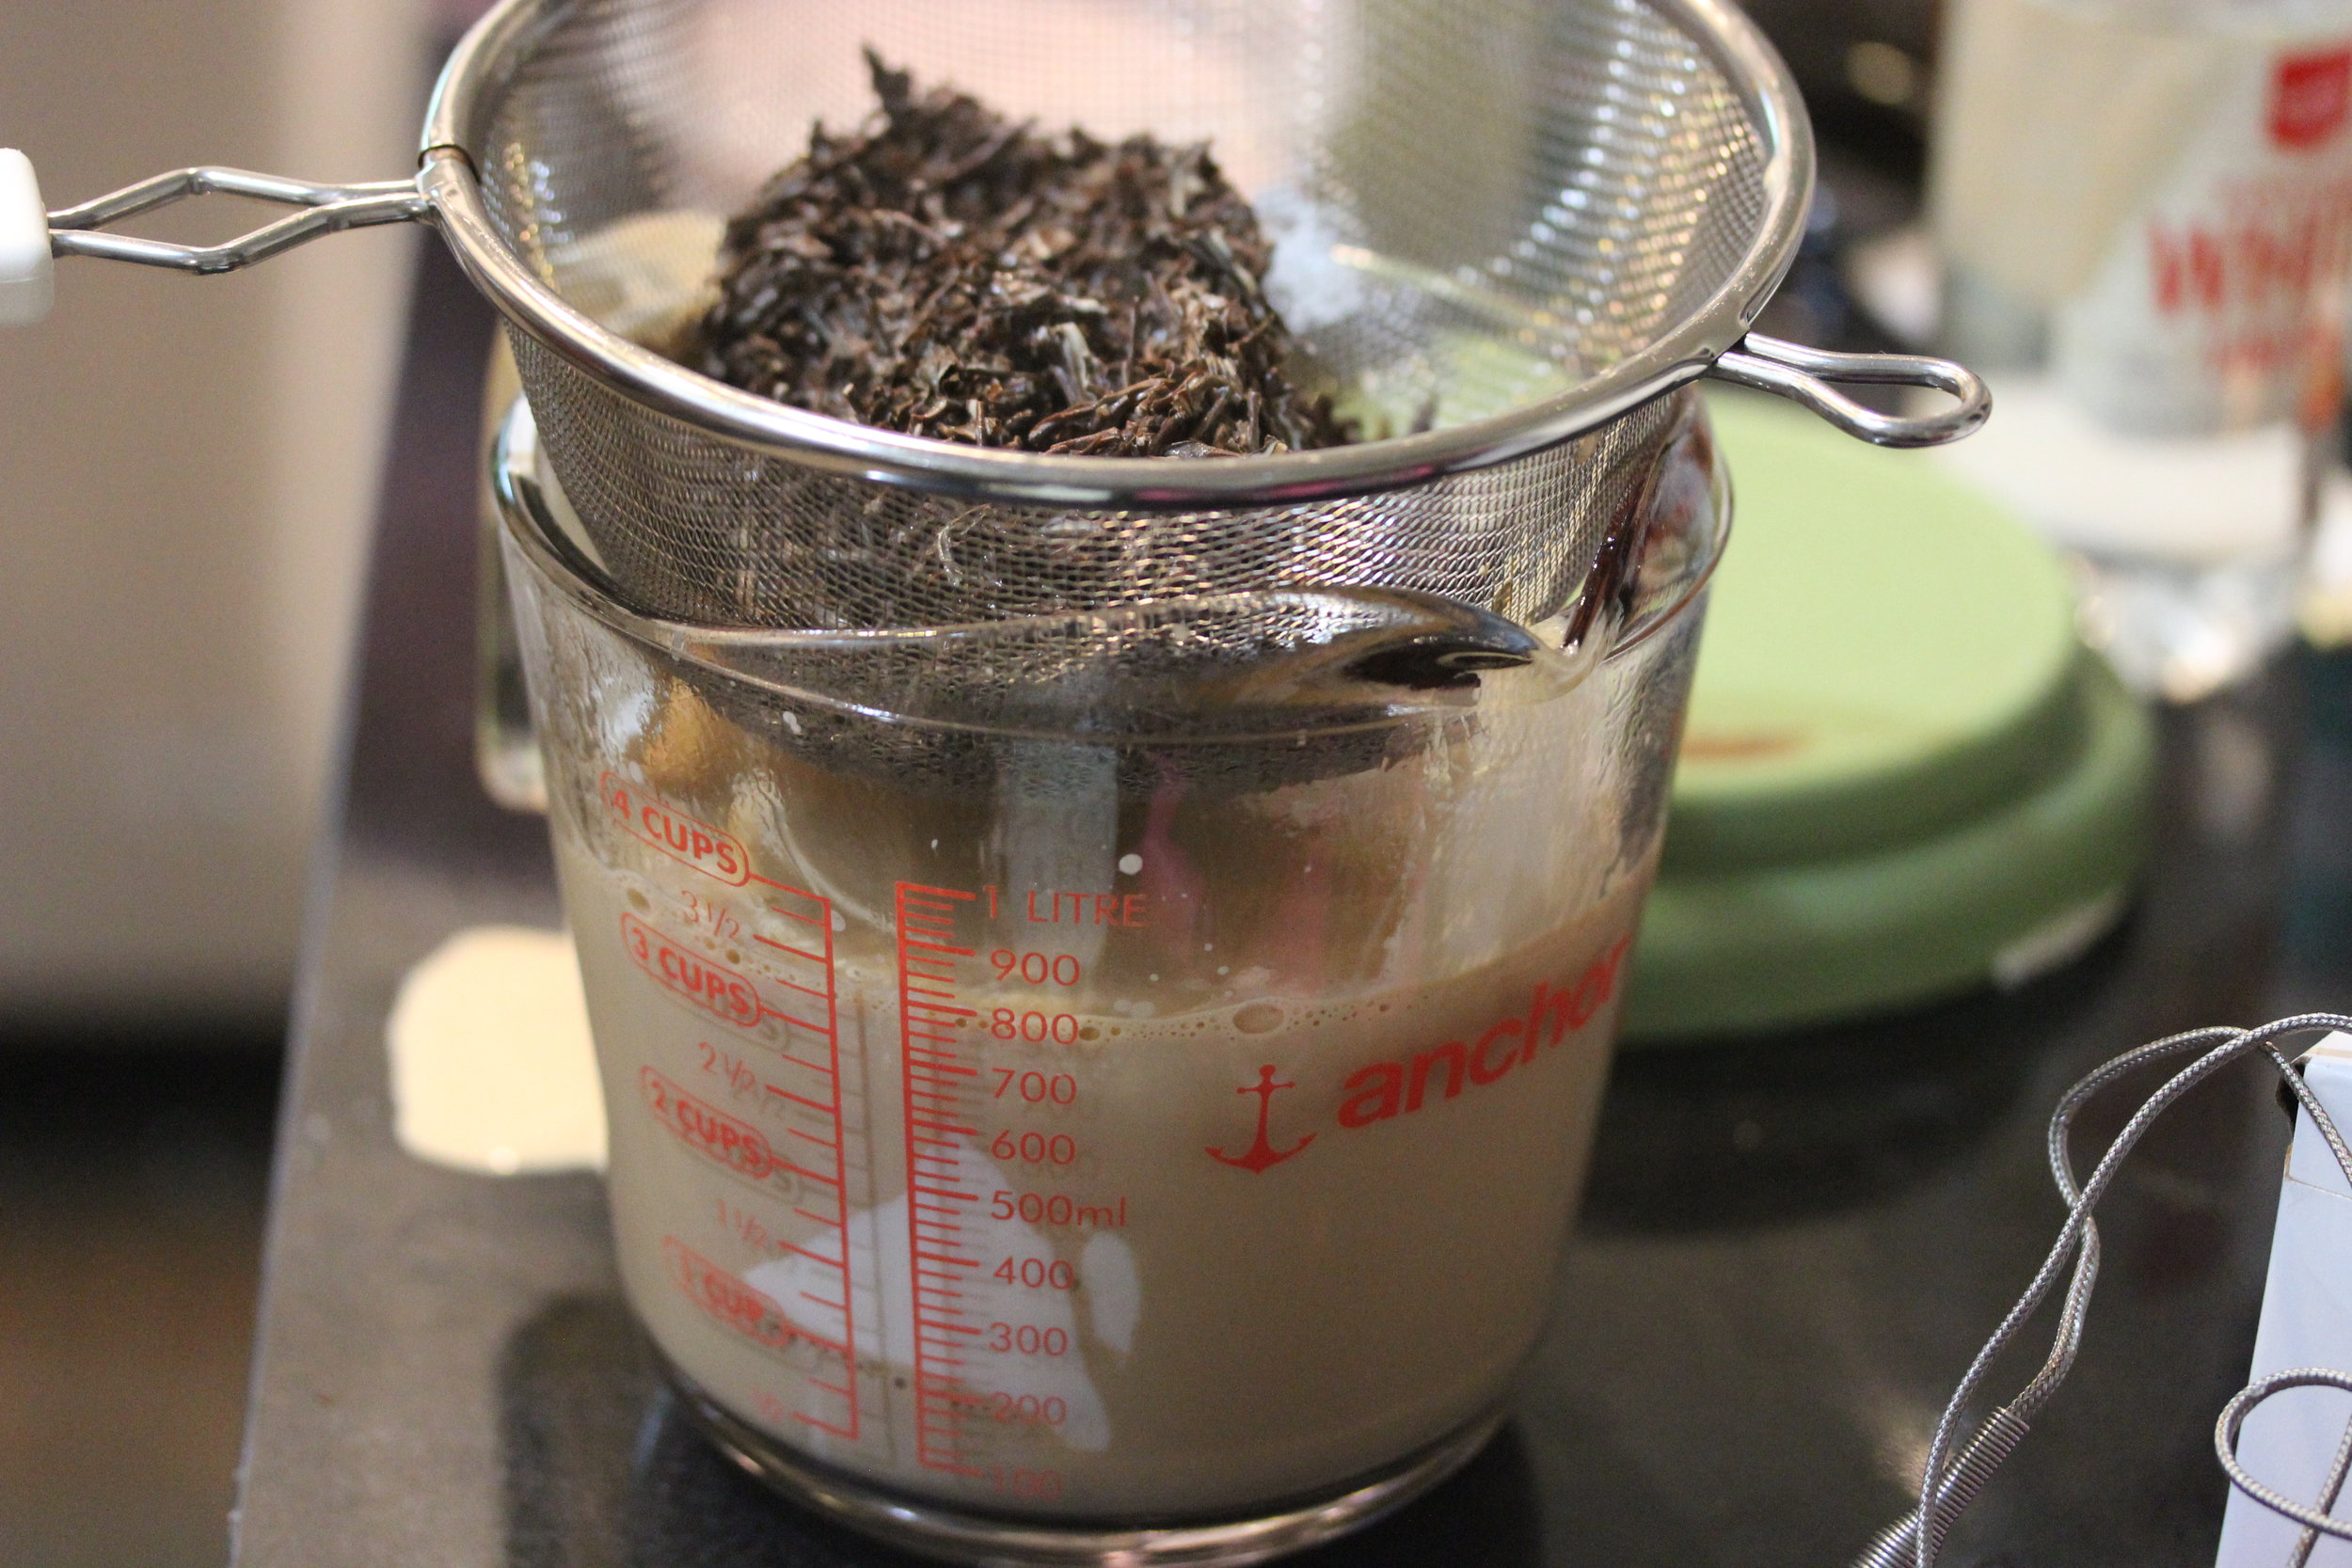
Add 6 oz. sugar and 1/4 c. juice to small saucepan and place over low heat to melt sugar. Once sugar is mostly melted, increase the heat to med-high and clip on your thermometer.

Once the egg whites look foamy, add 2 oz sugar and increase speed to medium high. Now monitor both: the sugar syrup should reach 240 degrees at the same time your meringue looks glossy and forms stiff peaks. If meringue is ready but syrup is not, simply stop the mixer and wait for sugar to catch up. Conversely, decrease the temp on the sugar if its heating too quickly. Do not allow meringue to over whip and become dry and chunky. Once the syrup and meringue are ready, pour the syrup directly from the saucepan into your running mixer in a thin steady stream, aiming between the whisk and the side of the bowl. Do not attempt to scrape any hardened sugar that has stuck to the sides of the bowl into the meringue. Allow the meringue to whip for another three minutes until fully incorporated. Turn out meringue into a grease-free bowl and place in fridge to chill for 15 minutes. Rinse mixer bowl with cold water to cool down, then dry off and return to stand.

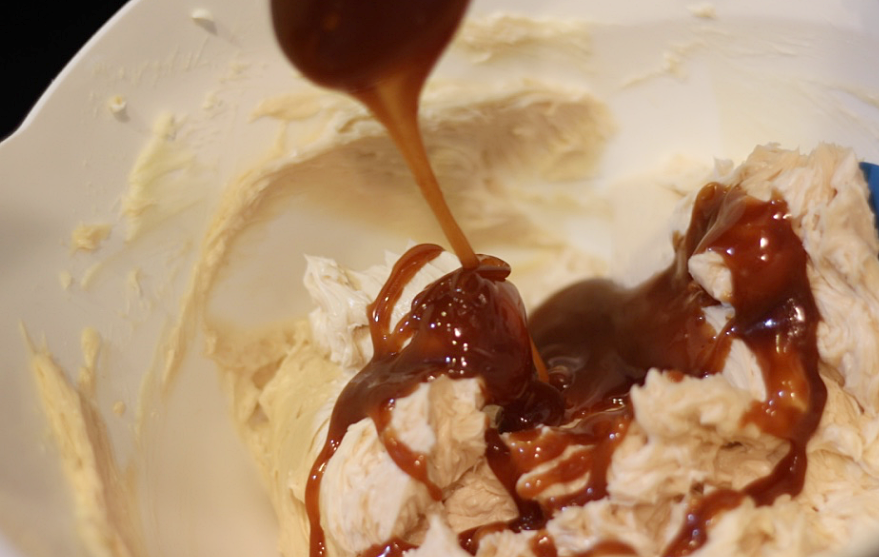
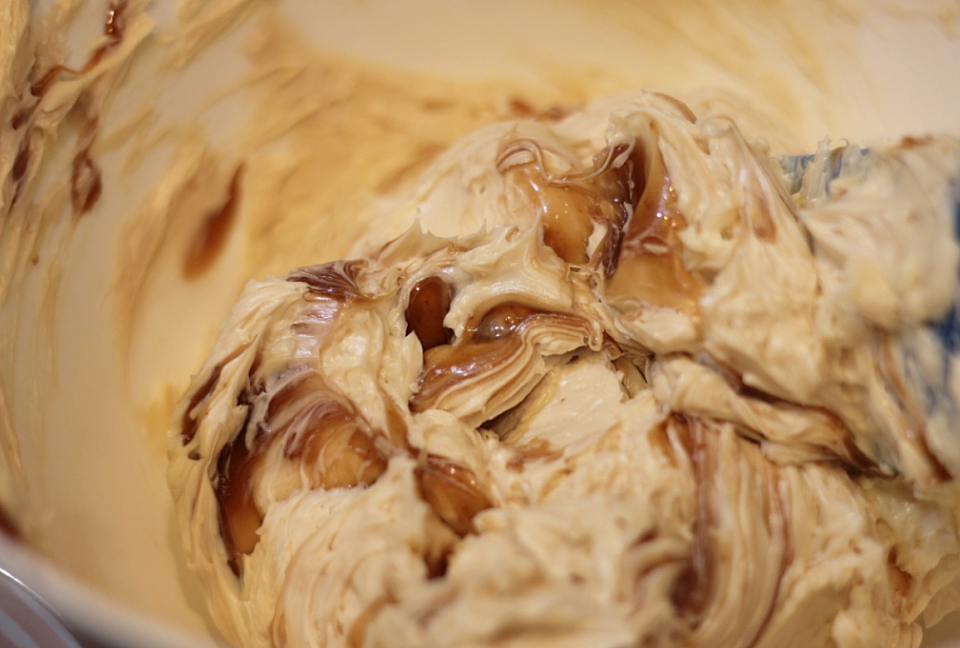
Change mixer attachment from whisk to paddle and add butter, salt, citric acid, vanilla extract, powdered sugar and 1/4 c. pomegranate juice to mixer bowl and whip butter about five minutes until light and fluffy. Test to make sure the meringue is cool, and add to butter in two stages, then mix for another 3-4 minutes until light and fluffy.

Screen Shot 2019-09-15 at 5.54.13 PM.png
Screen+Shot+2019-09-15+at+6.02.57+PM.jpg

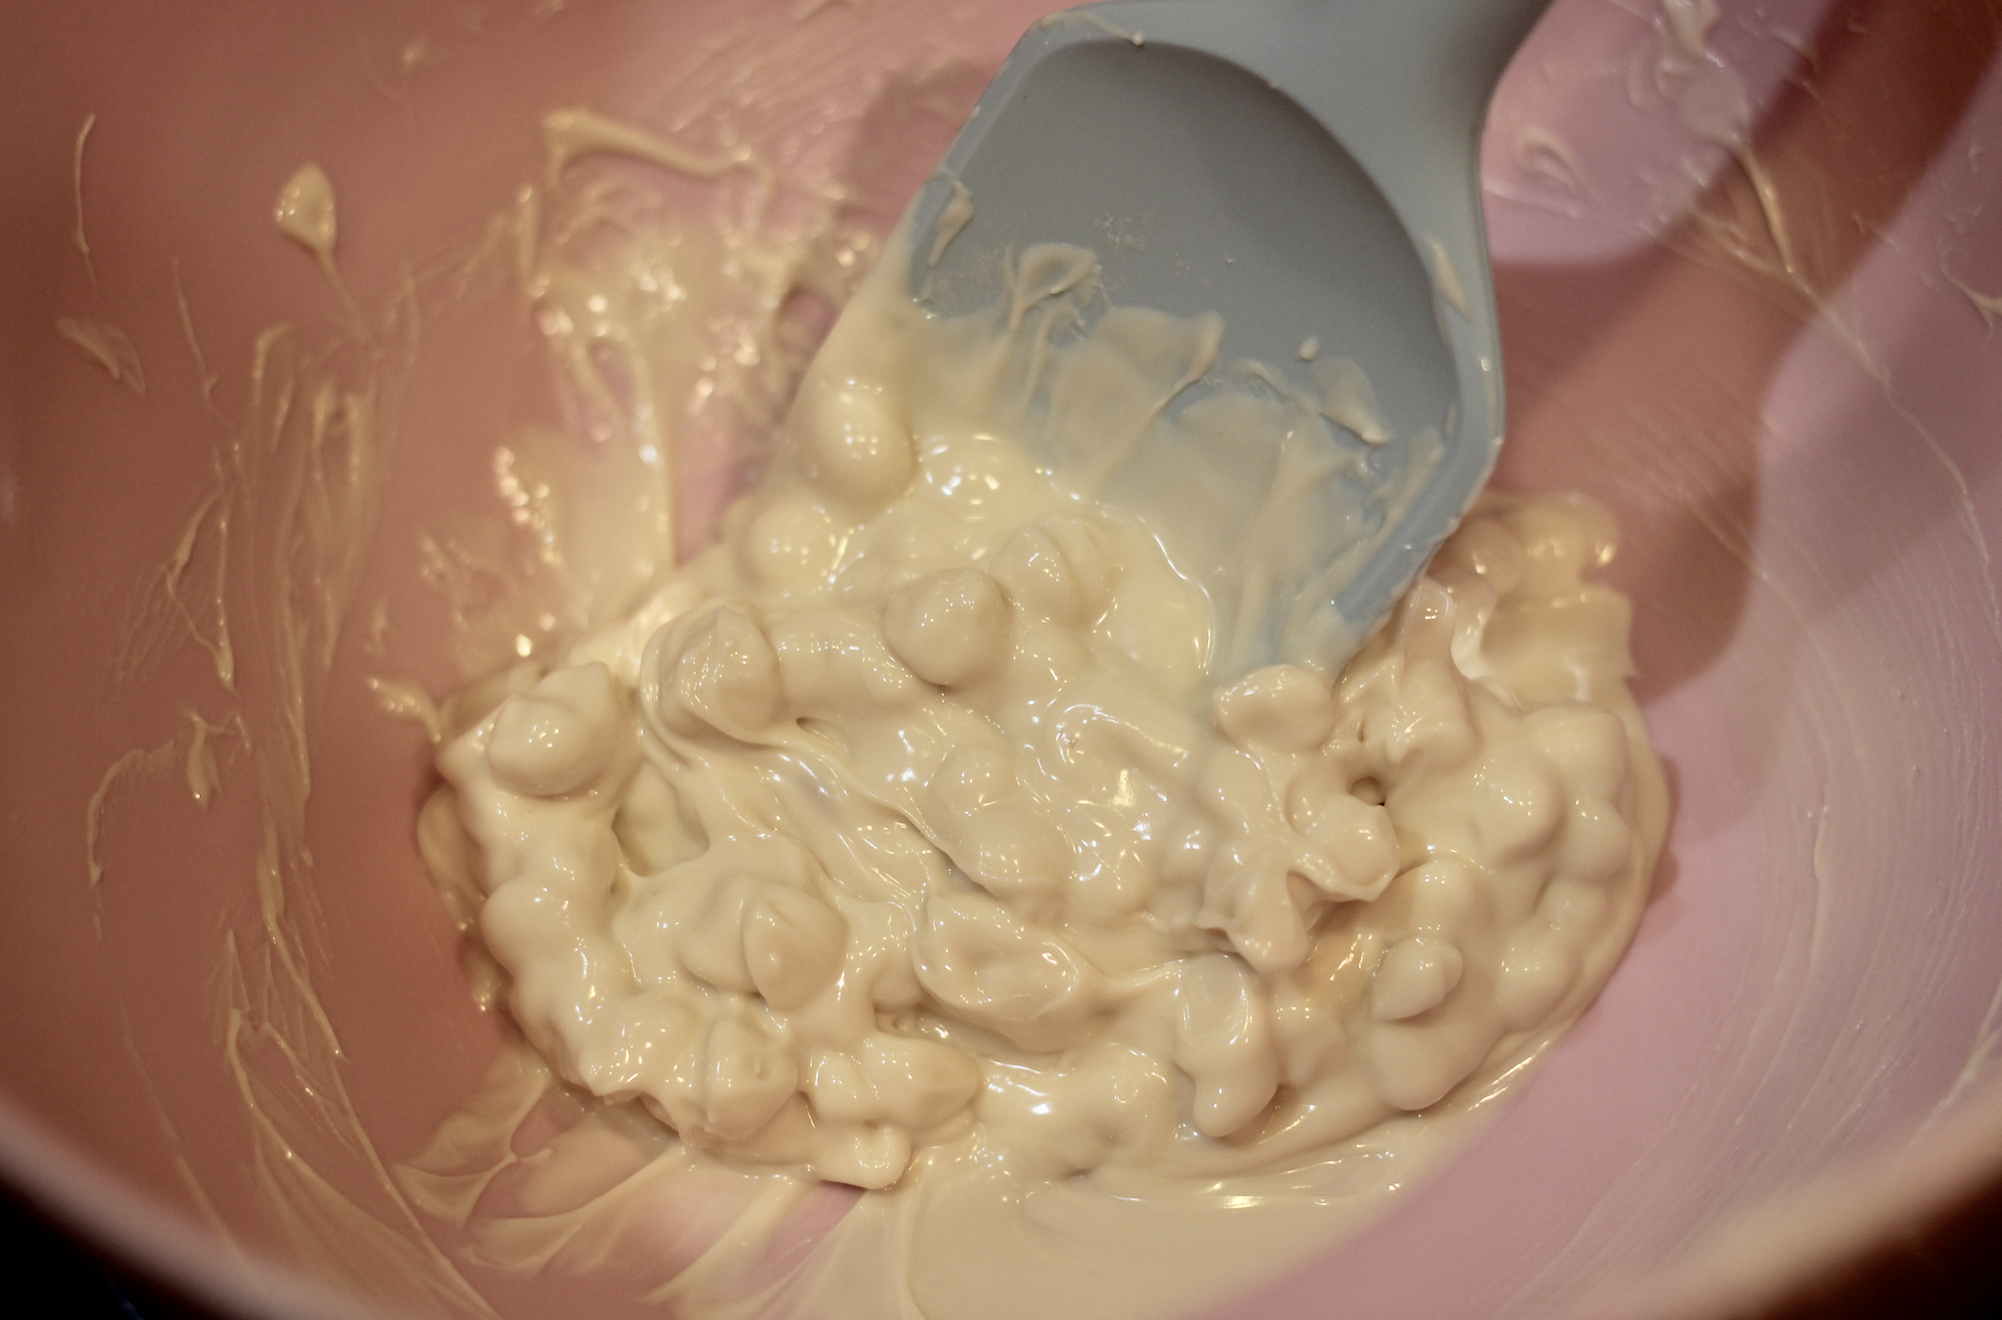
Now, the good news is that this ganache is a simple one-step procedure. Place 300 g. of chocolate pieces in a bowl then simply heat 100 mL of heavy cream until it just starts to simmer, then add to the chocolate pieces. Stir until the mixture is smooth and all the chocolate is melted. If you have a lot of unmelted pieces, zap the ganache in the microwave on low power for just 10 seconds at a time to reheat the mixture. Allow ganache to cool for an hour or so, until it loses most of its shine and has an easy to spread, peanut-butter like consistency.

I recommend a heat-safe plastic bowl when making white chocolate ganache. It’s very finicky and temp-sensitive, and can seize easily if overheated. Metal or glass bowls seem to retain too much heat and I have had problems with them. If your ganache does seem to get oily and separated, add a tiny bit of warmed up cream mixed with a drop of corn syrup to bring your ganache back to normal. Works every time.

This will make enough ganache just to cover the cake—feel free to scale up for more. Here is a pic of the chart I keep on my fridge for the perfect cake ganache in chocolate and white (treat Dulcey as white chocolate).

Screen Shot 2019-09-15 at 5.54.28 PM.png

This cake recipe is so easy and so rewarding. You can use really any pan here, even a rectangular one and make an easy sheet cake. Cream cheese buttercream is a fantastic pairing here if you want to go with something super easy. And as I mentioned, feel free to dress up the cake with more spices. I highly recommend a nice strong Vietnamese cinnamon here, like this fantastic one from Penzey’s.

CINNAMON CAKE

312 g. all-purpose flour

2 tsp. aluminum-free baking powder

1 tsp. baking soda

210 g. light brown sugar

230 g. sugar

1 tsp. fine sea salt

2 tsp. ground cinnamon

1 tsp. vanilla extract

4 large eggs, room temperature

1 c. canola or vegetable oil

1/4 c. sour cream

1 c. unsweetened applesauce

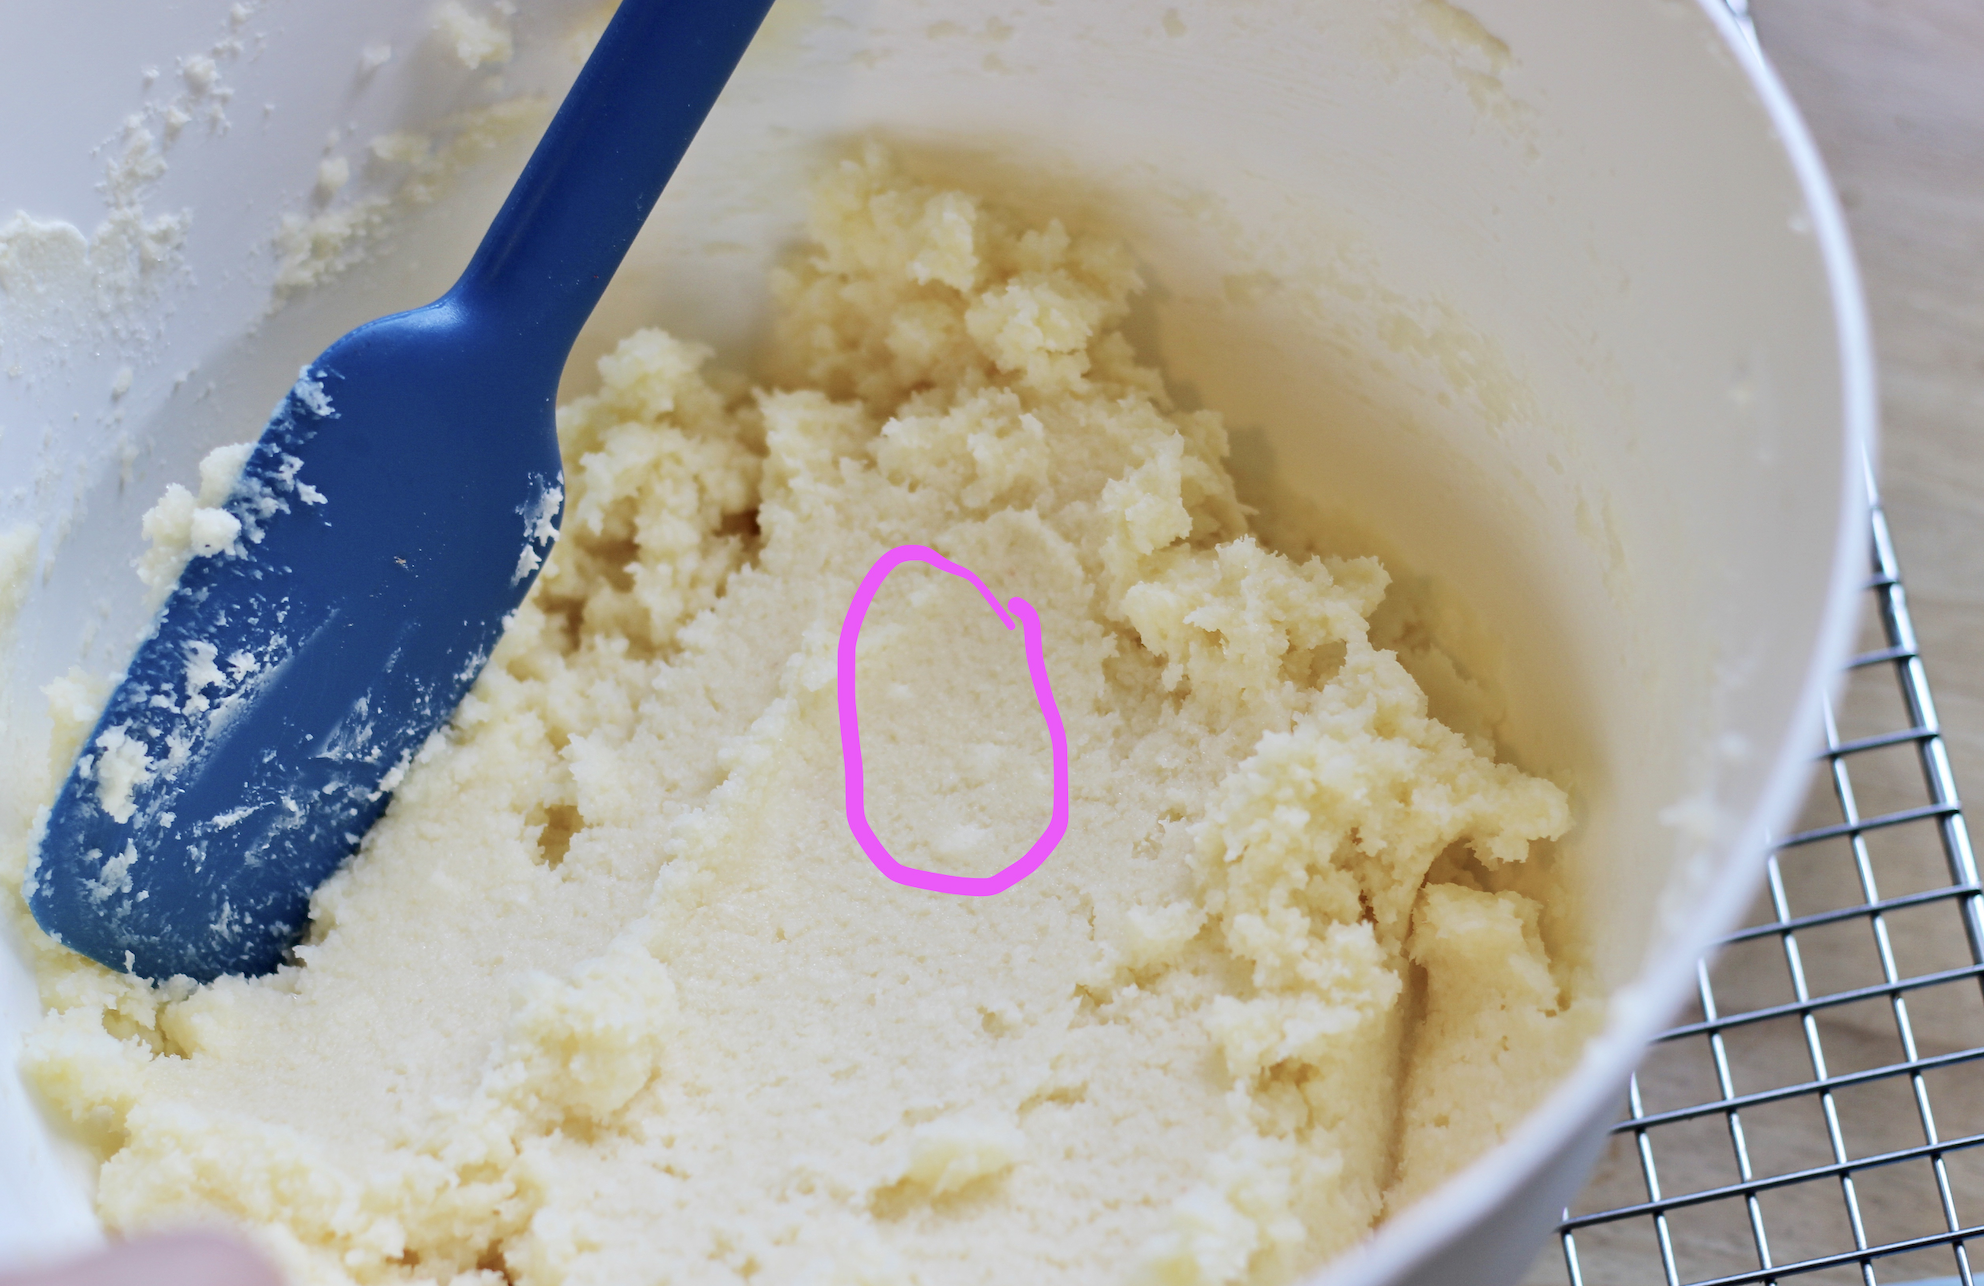
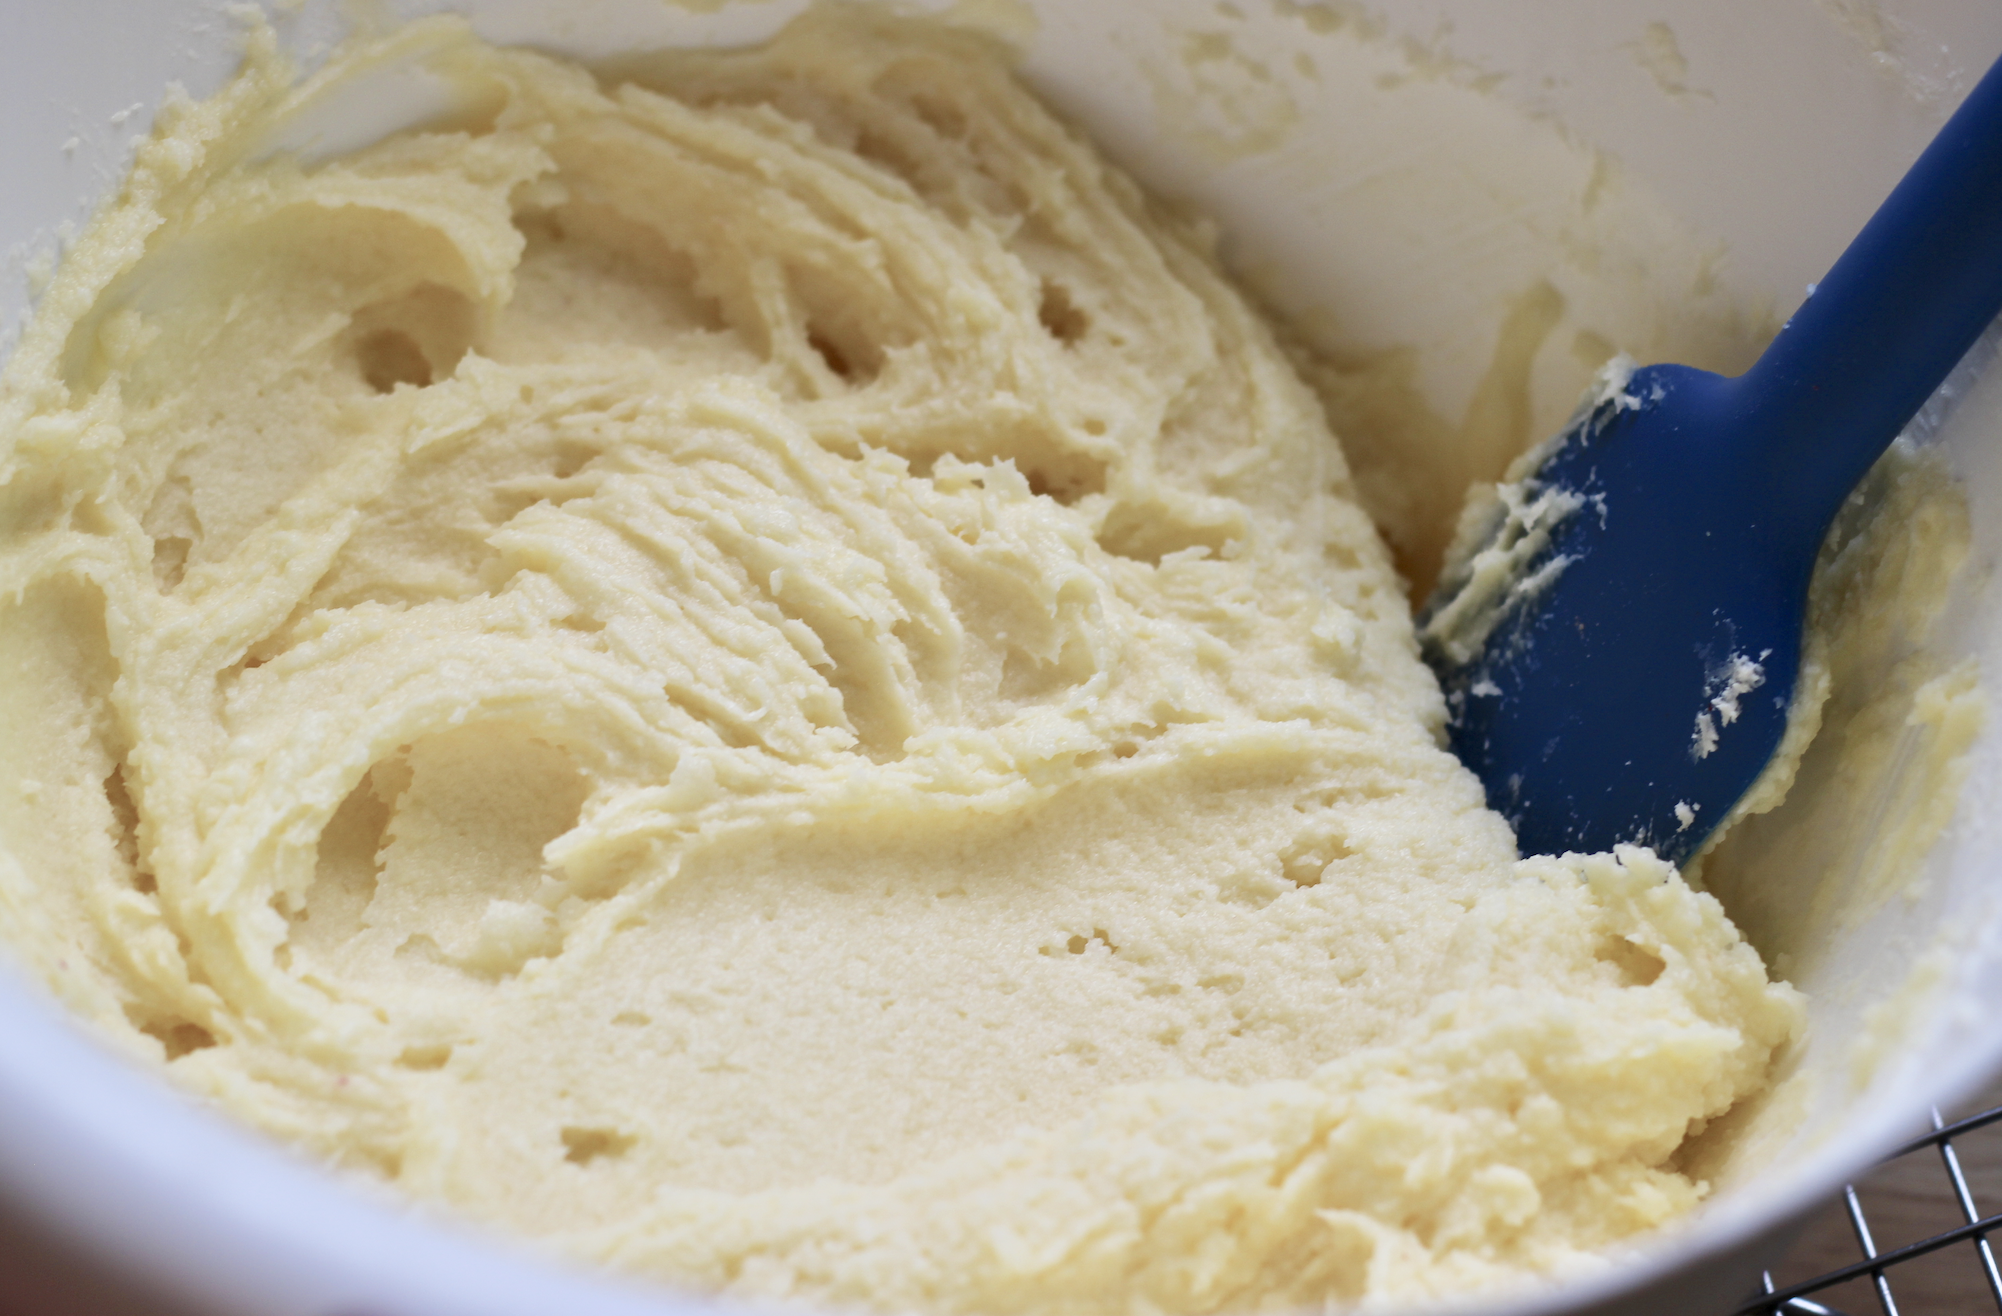
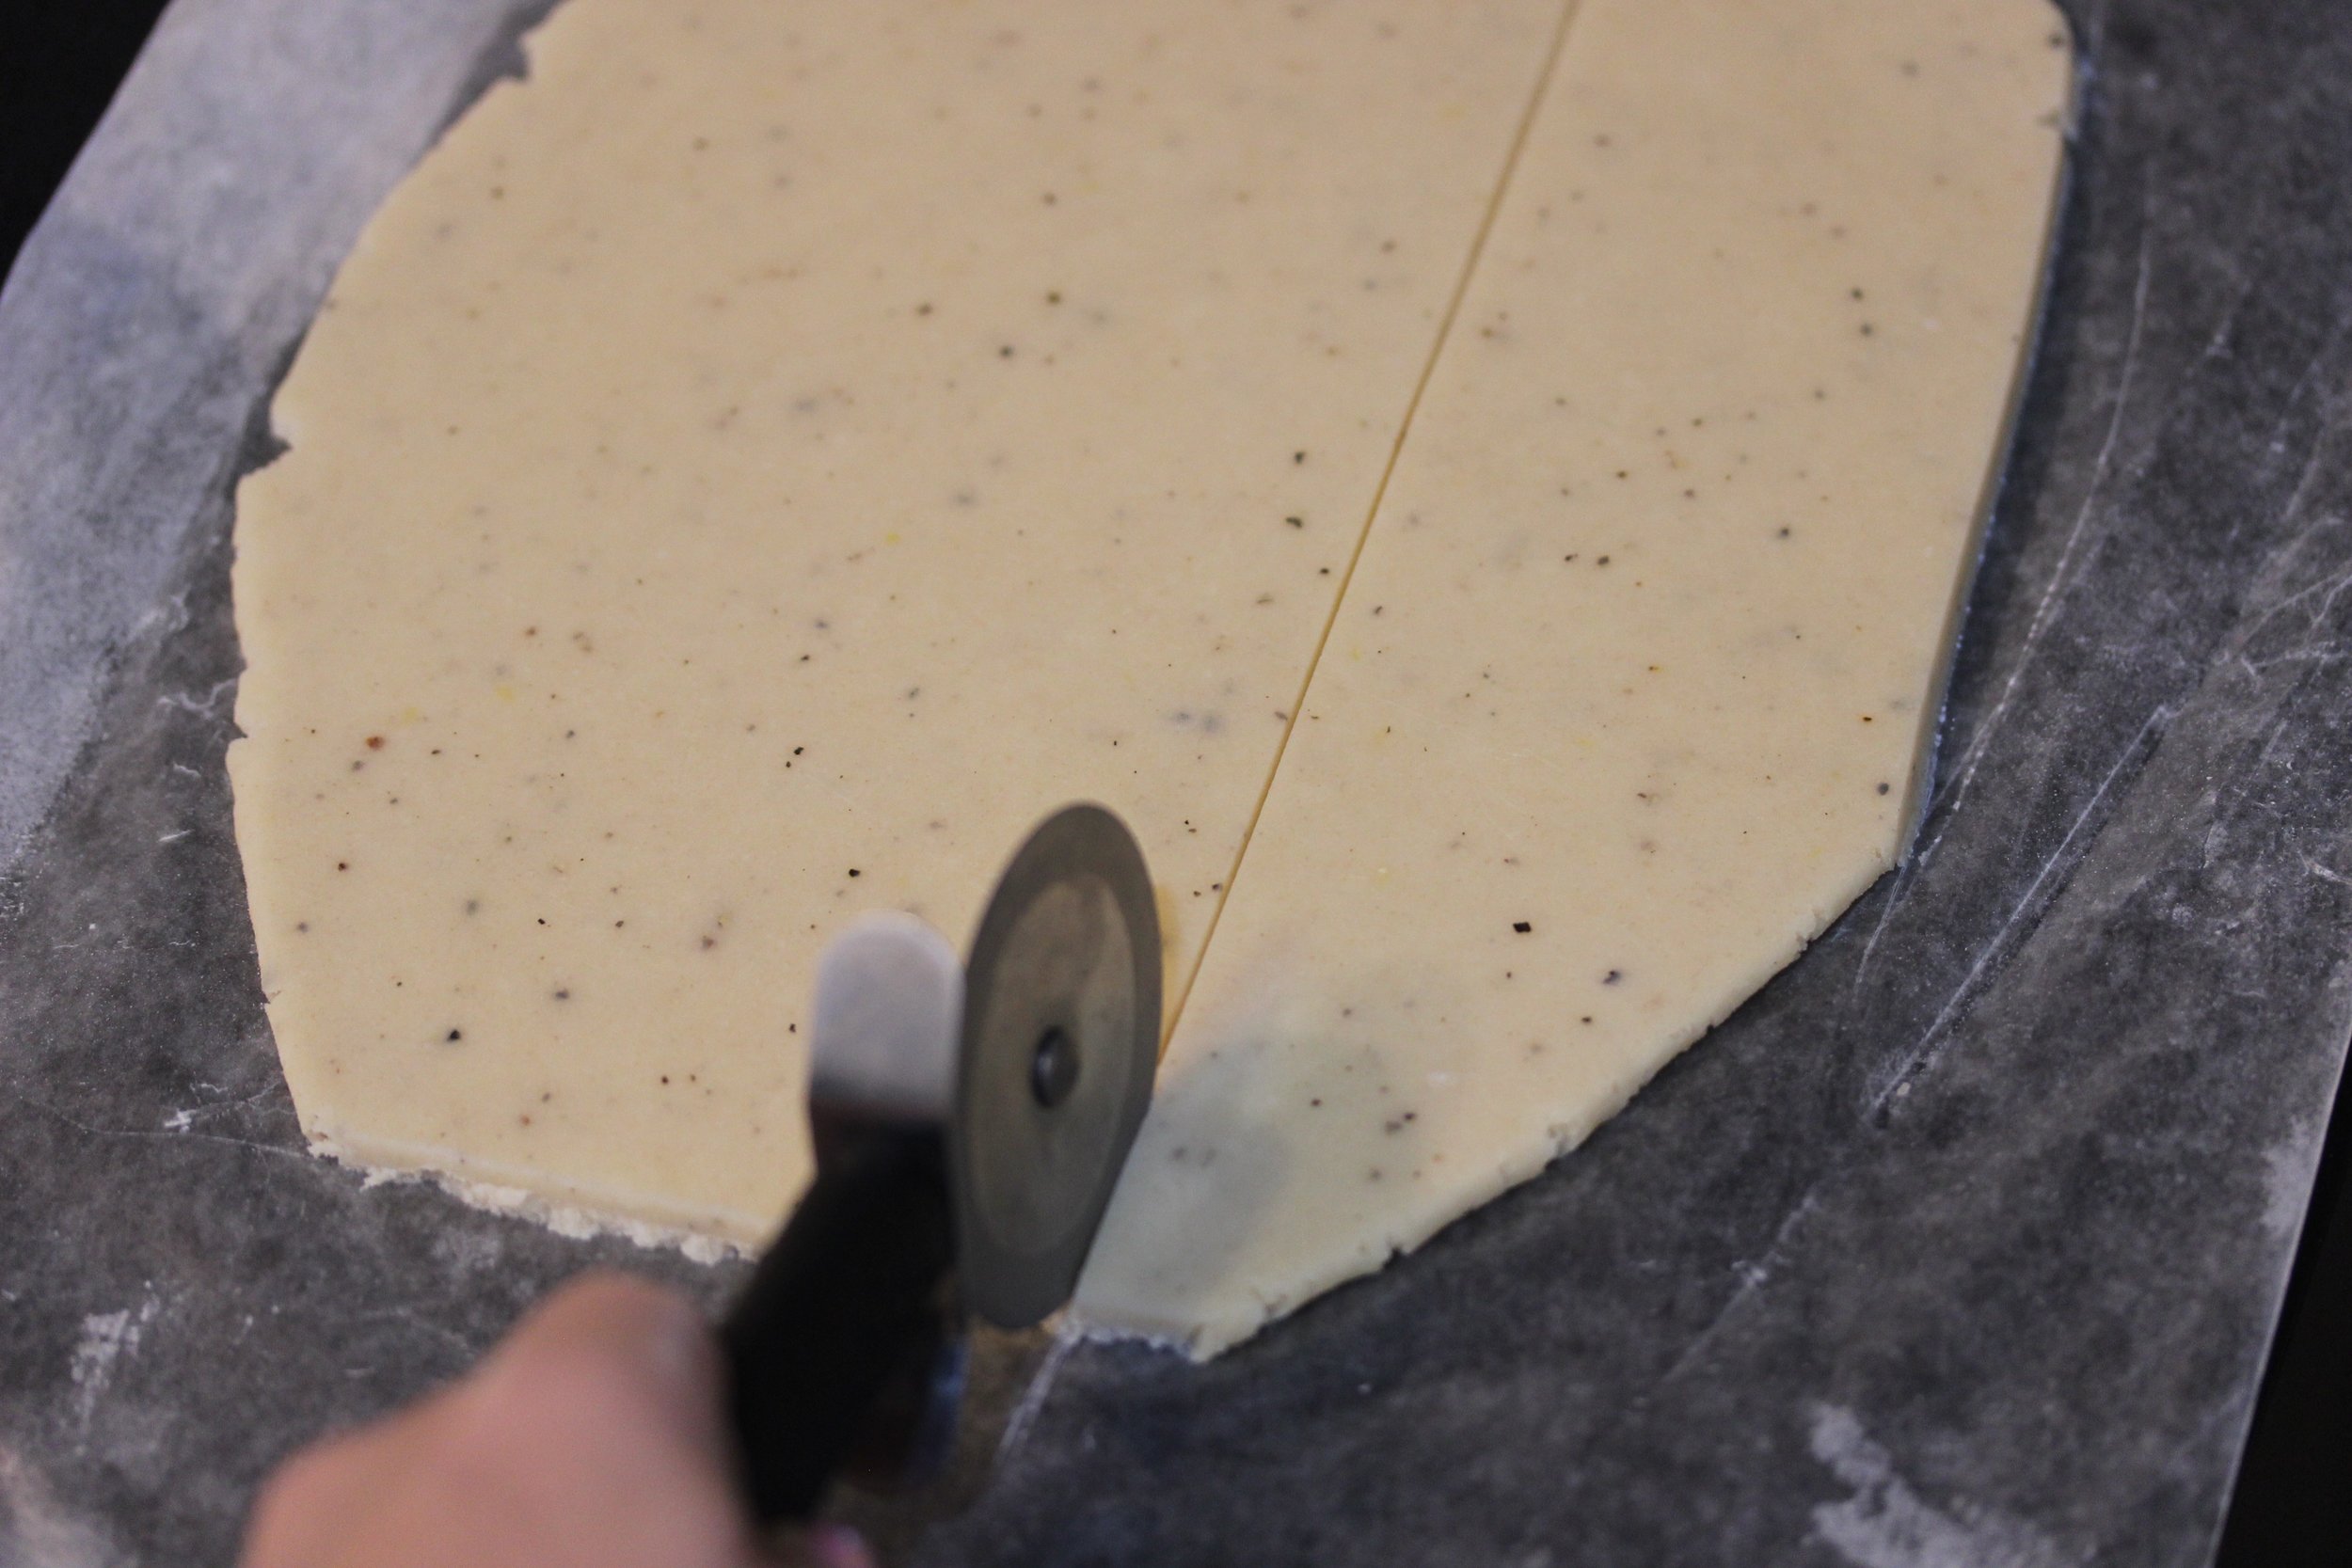
Preheat oven to 350 degrees. Line bottom of three or four 6” to 8” baking pans with parchment. Mix flour and baking powder and soda in a small bowl with a whisk until well-mixed. Add all of the rest of the ingredients except for the applesauce into a larger bowl and mix with a hand mixer on medium for about three minutes until smooth. Add in apple sauce, mix until smooth, then add the dry ingredients in two batches, mixing it on low just until fully incorporated. Split batter among pans and bake for around 20-35 minutes, depending on size of pan. Cakes are done when fully set in the middle and spring back when lightly pressed.

Screen Shot 2019-09-15 at 6.02.27 PM.png

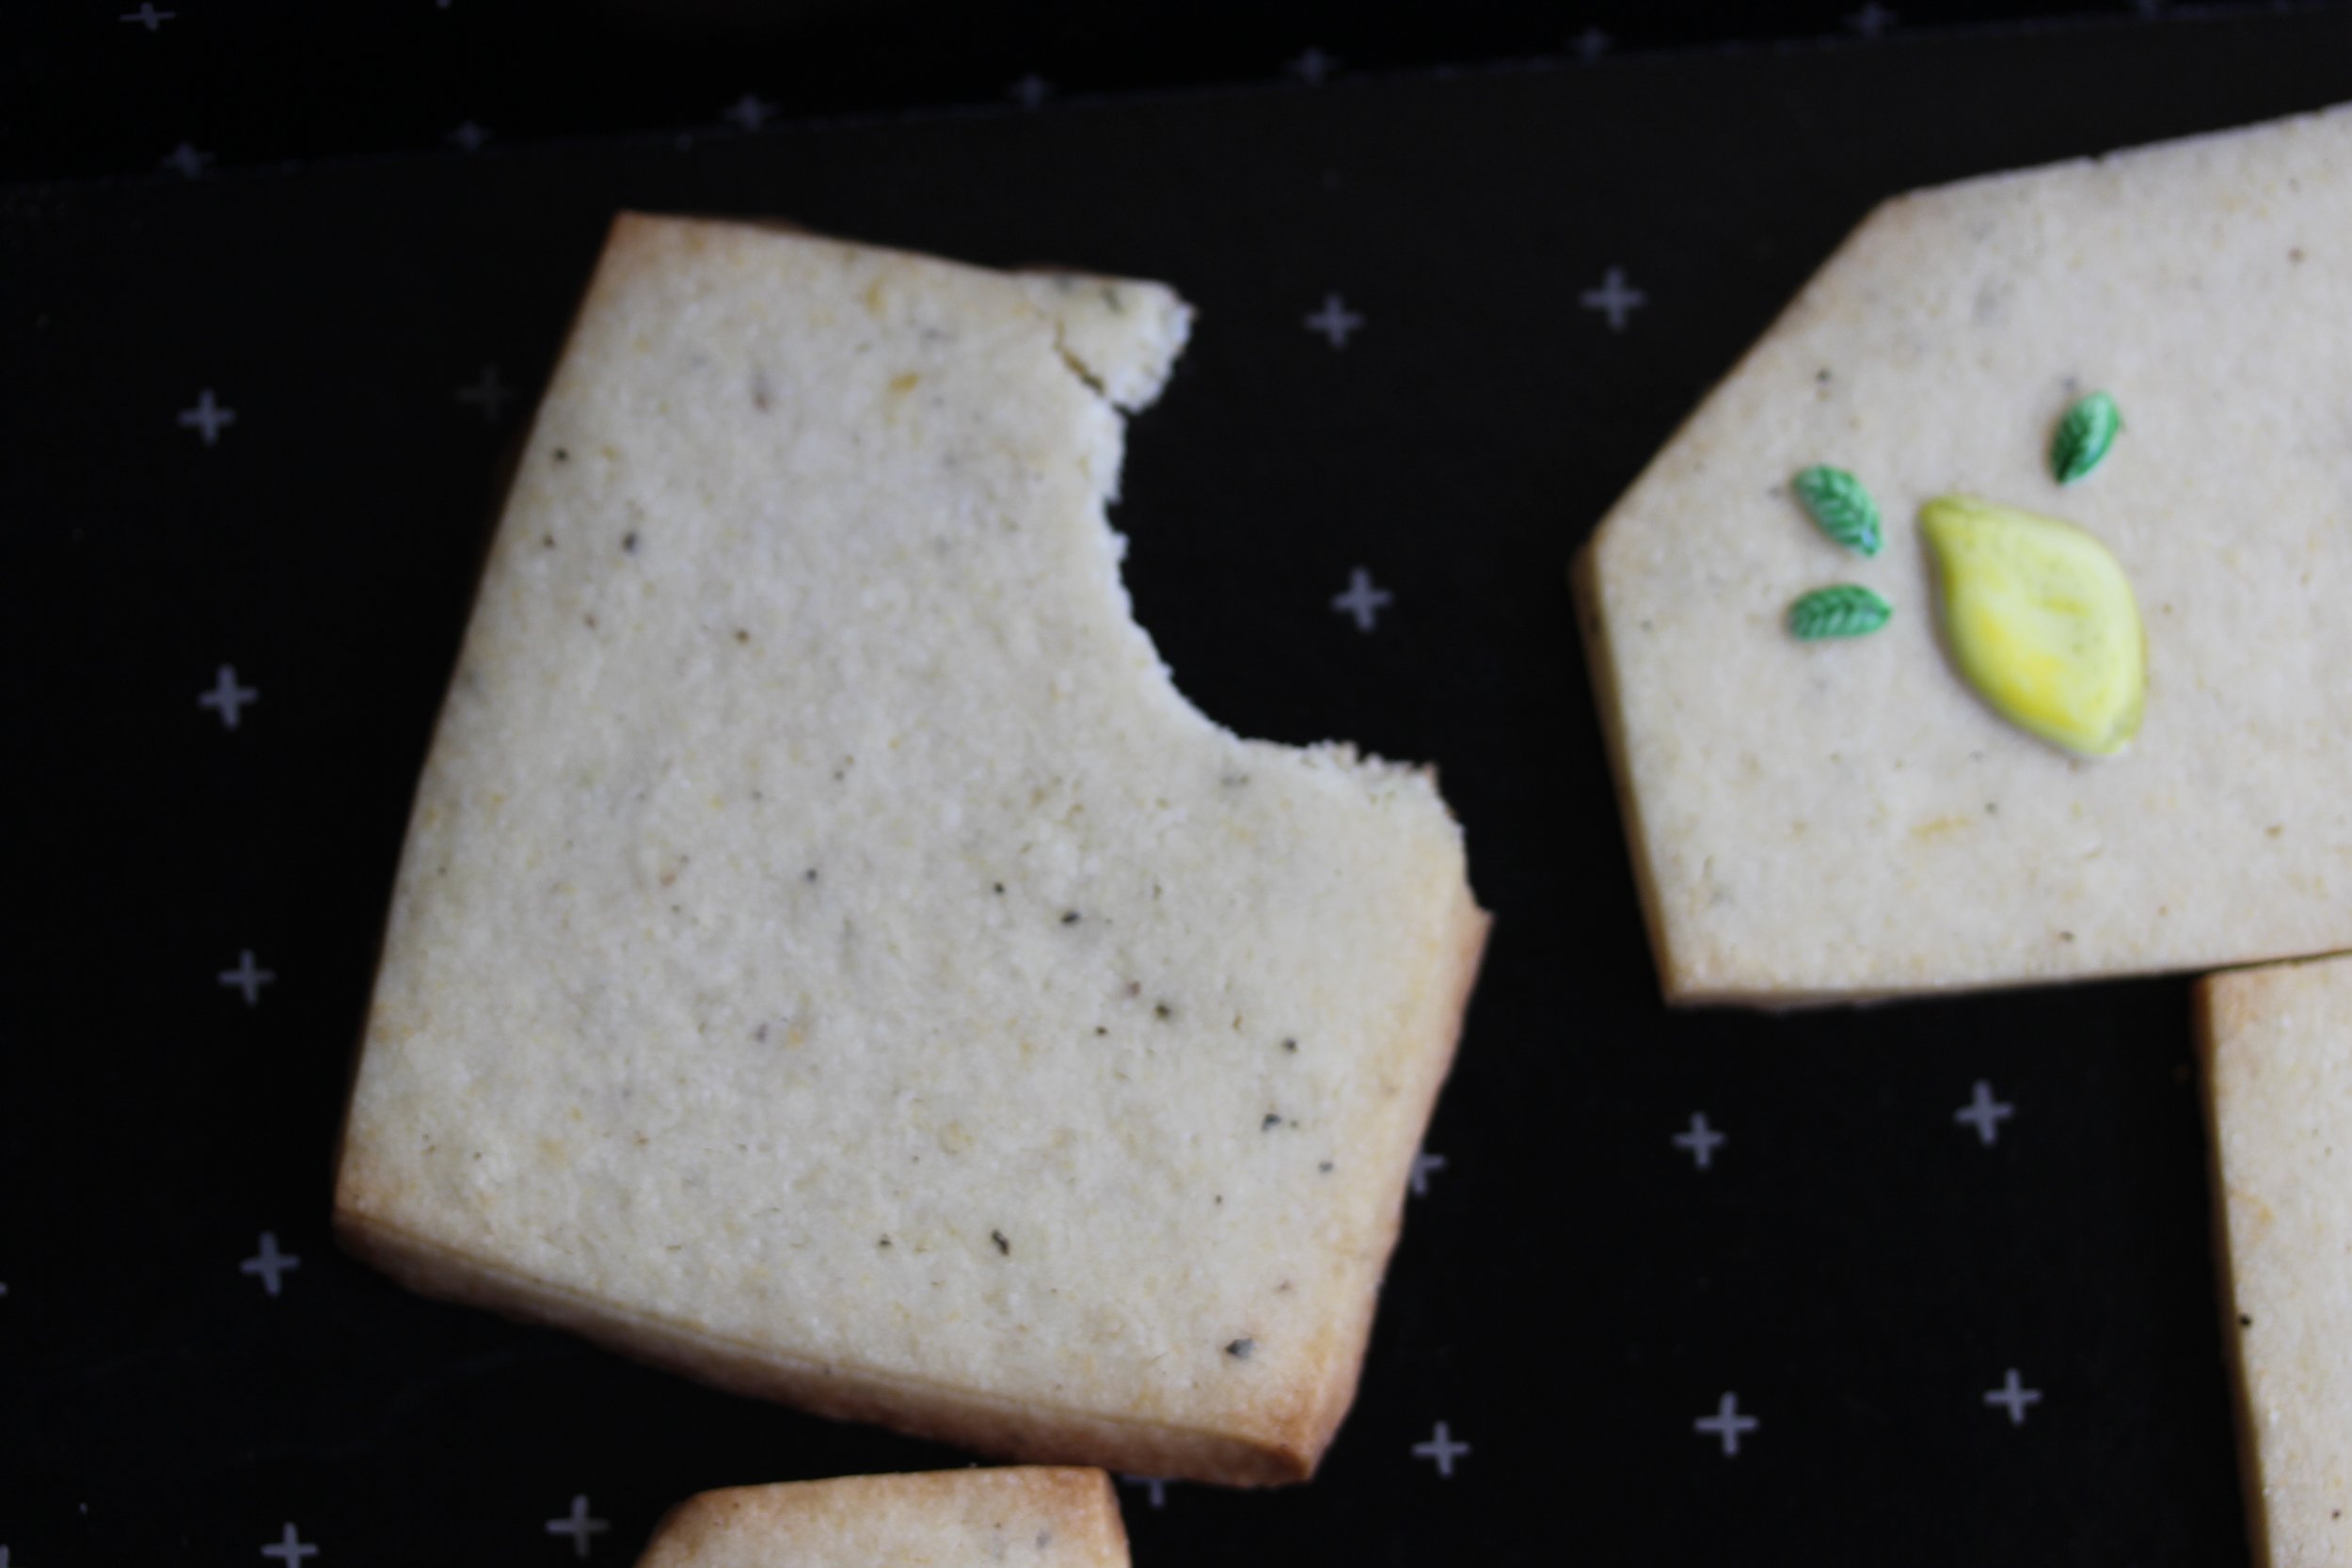
Allow to cool for 10 minutes in the pan, then turn out and wrap loosely in plastic wrap and allow cakes to cool completely before trimming and frosting.

Screen Shot 2019-09-15 at 5.55.02 PM.png

Fill your cooled cakes with your delicious pomegranate buttercream, then use your ganache as you see fit to cover—something rustic is just as nice as a super sharp edge made by ganaching plates. I don’t have a step-by-step tutorial (yet) on the blog for how I do mine, but its essentially the same technique as seen here from Cake Safe.

Screen Shot 2019-09-15 at 5.55.23 PM.png
Screen Shot 2019-09-15 at 6.00.42 PM.png

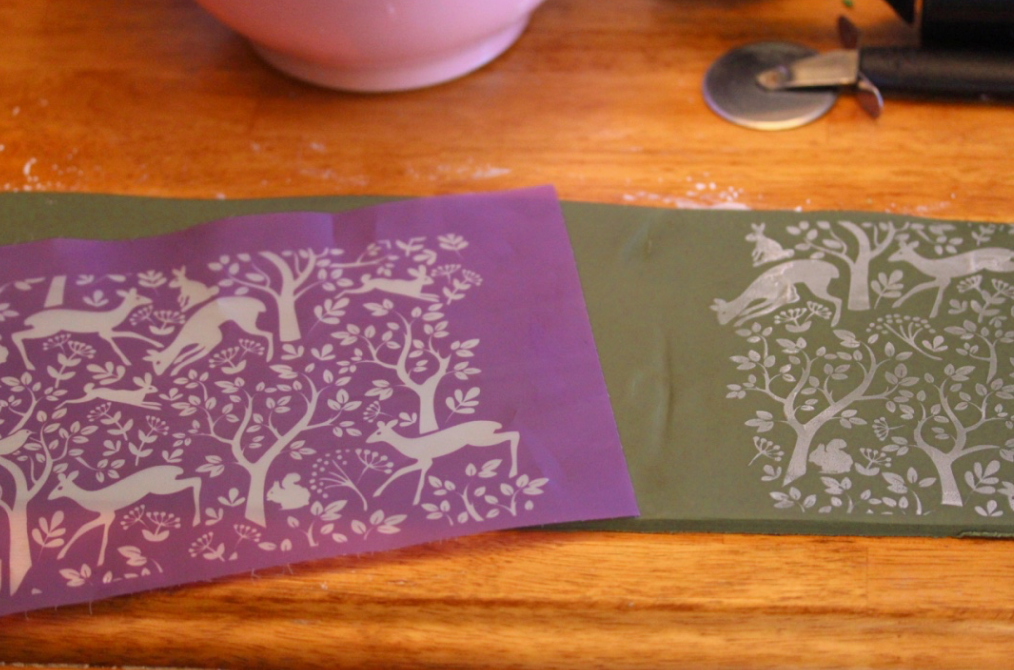
I then added an easy painted pattern to the ganache using edible paints and added a touch of greenery (from my own backyard!). This cake stayed moist forever and was so easy to eat thanks to the perfectly balanced flavors. I can’t recommend it enough.

Screen Shot 2019-09-15 at 5.59.50 PM.png

Berry Lemonade Cookies by Molly Brodak

Screen%2BShot%2B2019-03-02%2Bat%2B12.12.45%2BPM.jpg

This is it y’all, this is the cookie recipe.

The one I’ve been working on for two years.

My beloved dough is all dressed up for spring here with tangy berry and lemon flavors and I couldn’t be happier about how these turned out.

This recipe makes a perfect cut out cookie that is tender yet keeps any shape you cut it into. Some bakers simply use shortbread for their cut out cookies since, without any eggs or leavener, shortbread always keeps its shape. But this is no crisp, crumbly shortbread—this is a soft cookie with a tender crumb. And it’s all thanks to a couple of key techniques and ingredients, the most important of which is cream cheese.

Replacing some of the butter in a basic cut-out cookie recipe with cream cheese allows the cookies to stay soft and moist while minimizing spread. Plus the slight acidity of cream cheese acts as an extra tenderizer, ensuring these cookies have a smooth, soft mouthfeel and none of the dry flouriness that ordinary rolled doughs have. Just make sure you’re using real, full-fat cream cheese blocks and not the spreadable kind that comes in tubs. A fellow pastry chef told me that in France his colleagues call cream cheese, a newish product to them there, “Philadelphia” and praise its wonders—in Spain and Mexico it’s called queso filadelfia. It’s really a unique cheese when you think about it—it’s not exactly like other soft cheeses, and the particular fillers it uses (gelatin, xanthan gum, guar or carob gums) give it a special consistency that makes it both creamy/spreadable and able to keep its shape.

I developed this recipe because I really wanted a cut-out cookie that tasted as good as it looked. I’ve tasted plenty of fancy decorated cookies in my life and hooo boy, some people just do not care how their cookies taste, I can tell you that for sure. Especially in our image-soaked Instagram-era of baking where carefully edited photos are often valued over, you know, flavor, I wanted to make sure my cookies could walk the walk.

This dough is truly foolproof. It is very easy to work with, versatile, and tastes even better than all-butter cookie dough in my opinion. Follow a couple of my temperature techniques below and you can accomplish anything—ANYthing—with this dough.

Since I had lemons and blood oranges laying around, I decided to make a curd of each—honestly they are both great, but the lemon curd is really a knockout.

[heart eyes emoji here]

[heart eyes emoji here]

Here I’ve simply added fruit powder to the dough for a pop of color and intense flavor—pairing the cookies with tart lemon and orange curd makes them an incredibly fun and flavorful cookie. To make a plain version of these cookies, just omit the fruit powder. Or try an added 1/3 c. of cocoa powder for the best chocolate cookies you’ve ever tasted.

Side note: never listen to a recipe that tells you to “substitute” some flour for cocoa powder to make something chocolate. That’s insane. Cocoa powder is made of dried cocoa solids…it is not a grain, and it behaves very differently from flour in a recipe. Just because both are powdery and dry doesn’t mean you can substitute one for the other. This dough recipe is receptive enough to allow up to 1/3 c. of any low-moisture addition—cocoa, fruit powder, spices, herbs, chopped nuts, heck, go crazy.

Freeze dried berries are easy to find in the grocery store now (Trader Joe’s consistently has great freeze dried fruit options), although certainly you can find them online too in bulk. I used raspberries, strawberries and blueberries here, and I’ve also used peaches, apples, and mangos to great effect with regards to flavor (not so much with color). My mini food processor is perfect for the job of pulverizing the freeze dried berries into powder. If you don’t have a food processor, just beat/roll the berries in a ziplock bag with your rolling pin until finely crushed. DON’T FORGET to look for the little inedible silica packet that often comes in freeze dried fruit packages and remove it before whizzing everything together! I have made this idiotic mistake a few times when I’m in a hurry and have had to throw out entire batches of fruit powder once I saw the mangled silica packet buried in the powder.

Screen Shot 2019-03-02 at 12.05.05 PM.png

The only common errors that can happen with this dough are (1) not mixing the cream cheese and the butter well enough and (2) not pulling the cookies from the oven at the right time (more on that later). Since the two ingredients have different consistencies and usually different temperatures, you can sometimes get lumps of cream cheese in your dough if you don’t scrape the bowl well or mix long enough. Here I’ve stopped mixing too early so you can see the lumps.

see them lumps

see them lumps

Keep mixing until the butter and cream cheese are uniform, but do not overmix. You don’t want to cream this mixture—it would add too much air to these cookies, which would only make them drier and more likely to spread. It should stay “wet” looking and un-fluffy, like this. It kinda looks like hummus to me.

lumpless

lumpless

I used these adorable Thumbprint Cookie Cutter Stamps from Williams Sonoma that are ideal for creating sharp edges along with a perfect little well in the center for the lemon curd (lazy? Just use pre-made jam instead!). Or you could just make thumbprint cookies the old fashioned way—with an actual thumbprint—either way, these cookies are going to taste fantastic.

Screen Shot 2019-03-02 at 12.08.07 PM.png

Adding a touch of heavy cream to citrus curd makes it a bit more opaque, giving the color more saturation—plus it adds a touch of extra creaminess. I like tasty salted butter in my curd, but feel free to use unsalted if you prefer. Try to make sure you’re not letting any egg whites get into your mixture as you separate your eggs, since it is usually these errant whites that end up cooking and ruining your smooth curd with icky lumps. This recipe will make more curd than you need for the cookies, but not more than you need, you know, in your life in general.

LEMON CURD

5 large egg yolks

200 g (1 cup) granulated sugar

zest and juice of 4 lemons

113 g (1 stick) salted butter, cold, cubed

1/2 tsp (one splash) heavy cream

Bring about a cup of water to a simmer in a small saucepan. Whisk yolks and sugar in a metal or glass heatproof bowl and place over simmering water. Whisk for about a minute, until the yolks lighten, then add zest and juice. Whisk for 8 minutes, or until the mixture is thickened. Stir in butter, one piece at a time, until fully incorporated. Strain mixture into a small bowl and allow to cool to room temperature, then cover and place in fridge to chill.

You can see my blood orange curd was looser than my lemon curd—both consistencies worked just fine

You can see my blood orange curd was looser than my lemon curd—both consistencies worked just fine

Now that we’ve got that chillin in the fridge, it’s cookie time. This recipe as written below is a half batch; I always double the amounts you see here. I halved it because I imagine most people just don’t need as much dough as I usually need. On the other hand, this dough stays perfect in the freezer so I highly recommend just doubling it and freezing the extra dough into sheets and saving it in your freezer for the next time you feel like baking off a batch…

A quick note on rolling out dough. I don’t recommend using any flour whatsoever to roll this dough out—it already has the perfect amount of flour in it, and adding flour to the outside of a raw cookie can make the baked cookie taste floury and overcooked. Instead of rolling on a floured surface, use wax paper. My rolling pin never touches my dough! Here’s my technique:

Cut a long piece of wax paper, a bit longer than your cookie sheet. Place the rested dough on the wax paper and allow a margin of the paper to fall over the side of the table or counter you are rolling on. Then cover the dough with another sheet of wax paper and start to roll the dough, unsticking and repositioning the top sheet of wax paper as needed (I do this after each roll). Hold the bottom sheet of wax paper in place by pressing your legs or tummy against the lip of the wax paper and the edge of the table or counter. It’s a bit odd, but this is the best way to keep the wax paper from sliding around as you roll out the dough. Keeping the dough sheet on the wax paper also makes it super easy to pick up and transfer onto your baking sheet to freeze before cutting out shapes.

I also use perfection strips to keep my dough a consistent thickness. They work much better for me than the spacer rings you can buy for rolling pins, since I’m a klutz and I can never seem to keep the rings from rolling over my dough and messing up the thickness.

Screen Shot 2019-03-02 at 12.08.47 PM.png

Once the dough is fully rolled out, cover the dough sheet with plastic wrap and place in the freezer to chill until firm. All cookies I bake I cut straight from the frozen sheets of dough then pop immediately into the oven. You’ll get less spread and sharper edges by cutting and baking from frozen dough. Just be sure to peel off the wax paper as well as the plastic wrap and the cookies will come off your cutters easily and won’t lose their shape as you transfer them to your cookie sheet.

Now, you’ve got to be careful on timing here. The cream cheese and the fruit powder both work to mask the usual visual cues that tell you when a cookies is done—dry top, brown edges. The cookies will puff slightly as they bake, then start to settle. It is once they start to settle that you want to pull them. You’ll notice slight browning on the bottom edge of the cookie, but other than that, the cookies will not change color much—which is great for these fruity beauties.

Screen+Shot+2019-03-02+at+12.10.31+PM.jpg
gobble

gobble


BERRY COOKIES

1/2 tsp aluminum-free baking powder

400 g all-purpose flour

113 g (1/2 of an 8 oz package) cream cheese (not low-fat)

226 g (2 sticks) unsalted butter, softened

225 g granulated sugar

1/2 tsp fine sea or kosher salt

1 tsp vanilla extract

1/8 tsp almond extract

pinch citric acid (optional)

1 large egg yolk, room temperature

1/3 c freeze-dried strawberry, blueberry or raspberry powder (about 2 c. of sliced freeze-dried fruit will grind down to about 1/3 c.)

Whisk together the flour and baking powder in a small bowl and set aside. Using a hand mixer, mix butter and cream cheese on low until fully combined and no lumps of cream cheese remain. Add sugar, salt, extracts, and citric acid and mix until just incorporated. Add the yolks and mix again until just incorporated, then repeat with the fruit powder. Remove dough ball from bowl and knead a few times in your hands to make sure the flour is fully incorporated. Divide into two balls and flatten into discs. Wrap well in plastic wrap and allow to chill in the fridge for about 20 minutes—until it is rested and firm but not rock hard. Roll out each disc between sheets of wax paper then freeze dough sheets if using a regular cookie cutter, or cut shapes immediately if using the cookie cutter/stamps with plungers. Freeze cookies for at least 15 minutes before baking.

When you're ready to bake, preheat your oven to 350 degrees F. Line cookie sheets with parchment or silicone baking mats. Remove dough from freezer, cut shapes directly from frozen dough sheets, and bake frozen shapes immediately on cold or room temperature cookie sheets lined with parchment paper. If shapes become soft as you work with them, be sure to refreeze before baking. Bake for 8-12 minutes. Cookies will not brown much due to the cream cheese, so just look at their bottom edges for slight browning where the cookies touch the cookie sheet/parchment/silpat.

Allow to cool completely, then frost and fill with chilled lemon curd.

SO pretty and SO YUMMY

SO pretty and SO YUMMY

Chocolate Poppyseed Graham Shortbread + Modeling Chocolate Tutorial by Molly Brodak

Screen Shot 2018-08-06 at 3.23.25 PM.png

After a season of cakes, I am ready for something with a little more texture to it, something crunchy and rich. These cookies have an unbelievably addictiveness to them and I think it's down to the texture: crumbly, tender shortbread with bursts of crispy poppyseeds and crunchy sanding sugar on the edges, not to mention the incredible flavor from Banner Butter. The graham flour, which I'll explain more about below, provides a lovely, homey flavor and also adds another dimension of texture for a truly multi-textural experience. They are salty and rich with dark chocolate flavor, perfect for paring with coffee or, as I did here, a bit of white chocolate. They are also exceptionally easy to make and have only one (ONE) annoying step (grating frozen butter), which I think is impressive for how delicious they turn out.

oh my god

oh my god

Let's start with the modeling chocolate.

Now, modeling chocolate, if you don't know, is a miracle. It's as pliable as fondant, perfect for using with silicone molds, sculpting, rolling out and cutting, or just messing around with, but unlike fondant it is DELICIOUS. 

Unlike fondant, which is evil to put on cookies, it is delicious.

Even if you don't have any cool food-grade silicone molds sitting around to press the modeling chocolate into beautiful decorations, you can still roll it out and make some beautiful designs with a knife or small cookie cutter if you want. You can even brush it with edible luster dust for a fancy finish. Stored in a sealed container, it should last a long time, reviving with a bit of warmth from your hands, and can be used for all kinds of fun baking projects down the line, so I recommend having some on hand.

I'm not even going to give you a recipe for it since there is no way to top Cake Paper Party's chart and instructions. My only change is that I highly recommend using Guittard's Choc-Au-Lait chips for your white chocolate version and nothing else. They are, as I mentioned a few posts back, the only edible white chocolate chips on the market in my opinion. I found them recently at Whole Foods, so you might try that if you're not willing to wait for an online order.

So basically you just melt the white chocolate chips, then mix in the correct amount of corn syrup for the consistency you want. Be quick and gentle when folding in the corn syrup. As soon as the mixture has the consistency of peanut butter, STOP. There may still be streaks of corn syrup--it's ok. Let it all cool for at least two hours.  Knead once cool, and the mixture should incorporate to a smooth, play-dough like consistency. 

See the first photo here? That's as far as you should go when microwaving white chocolate to melt it. Stop while you still have large chunks, then just stir until the chunks melt. Heating your white chocolate chips in the microwave beyond this point only leads to despair. Trust me.

In general, be careful of overworking modeling chocolate. If it gets too warm from your hands, it can break into an oily mess. There is a way to fix this though, so don't toss it. I really think these cookies are even better with a smidge of the creamy white chocolate on top, so even if you didn't want to mess with all this I would still throw in some rough-chopped chunks of white chocolate into this shortbread, or drizzle some melted on top for a very easy fix.

Screen Shot 2018-08-06 at 3.23.14 PM.png

Now onto the cookies themselves. We've covered shortbread already, and this one has some changes from that recipe (which I still think is the best all-around vanilla shortbread out there) due to the cocoa powder and this cultured butter I want to use.

I am IN LOVE with Atlanta's own Banner Butter, and I knew it would shine in this shortbread. If you can't find Banner, be sure to use some other kind of cultured butter as a substitute, like Plugra, Lurpak, or a local butter if you can find it. The slight tang to this butter gives the cookies a subtle buttermilky flavor, and the rich fat content is important to the recipe proportions.

Screen Shot 2018-08-06 at 3.20.52 PM.png

You can keep a log or two of this dough in the freezer forever, and whip it out any time you need a quick cookie for your guests. Or yourself. Just whip out your log and slice. Ok sorry, I had to. I'll stop saying "log" now.

chop your log (SORRY) with a knife warmed over the stovetop for easy slicing. And don't use a marble cutting board. Why would such a thing even exist

chop your log (SORRY) with a knife warmed over the stovetop for easy slicing. And don't use a marble cutting board. Why would such a thing even exist

Graham flour is the same thing as whole wheat pastry flour, but it is not exactly the same thing as whole wheat flour. Named for who else but the 19th C Presbyterian minister who railed against bread made with white flour (he called it "tortured") and masturbation (he called it "Self-Pollution"), graham flour is milled from the same soft wheat that cake flour is made from and it is unsifted, unlike whole wheat flour. The grain's outer hull is ground more coarsely, and yet the inner kernel is finer than whole wheat flour, so what you end up with is a light, not dense, crumb while still benefitting from the texture of the whole grain particles. It also has that nutty taste that will remind you of a graham cracker, which makes a nice base for the chocolate and acidic butter here to play against.


Chocolate Poppyseed Graham Shortbread

230 g (8 oz, two sticks) frozen and grated unsalted cultured butter

1 tsp. fine sea salt

2 Tbsp. poppyseeds

1 tsp. vanilla extract

125 g. powdered sugar

280 g. (2 c.) Graham flour 

38 g. (1/3 c.) dark cocoa powder (I always use Hershey’s Special Dark)

2 egg yolks, room temperature

Coarse demerara sugar, for sanding

Place butter in freezer for at least two hours, preferably overnight. Once butter is rock-hard, grate quickly using a box grater into a large bowl, re-freezing the butter if it starts to soften. Chop up the last few chunks rather than grating down to your thumbs.

Sprinkle salt and poppyseeds over grated butter then return to freezer for at least 20 minutes. Meanwhile, whisk powdered sugar, flour, and cocoa powder together in a small bowl. Once butter is chilled, add flour mixture and quickly toss with your hands (use disposable gloves for this part if you have them). Then, add the egg yolks and vanilla and quickly mash and squeeze dough until it comes together. It may be streaky with chunks of butter. Squeeze just until it holds together, then separate into two balls and place onto plastic wrap. Work the balls into logs and roll tightly using the wrap. If dough becomes soft and warm, allow to chill before proceeding. Unwrap, the re-roll the logs in coarse Demerara sugar, then wrap tightly. Place the two logs into the freezer to chill overnight or until completely solid, at least four hours. 

Heat oven to 375 degrees F, slice dough into ¼ inch discs, and bake for about 12 minutes on a parchment-lined tray. Cool completely before storing.

Seen here piped with celestial royal icing designs

Seen here piped with celestial royal icing designs

Assam Cake with Blood Orange Italian Meringue Buttercream by Molly Brodak

IMG_6603.jpg


It's been a while since I have reminded you of how much I love tea, I realize. 

Assam tea in particular has such a rich, malty taste that I knew it would be delicious in a cake, especially paired with a bright, floral-ish citrus like blood orange. The flavor combination is delicate and interesting, one of my new favorites.

The design for this cake was inspired by one of my favorite local Atlanta artist, Charlotte Smith. I fell in love with her work when I purchased one of her tea cups (pictured above) from Young Blood Boutique and filled it with tea and held it in my hands. Her cups are transcendent vessels for tea lovers, just the perfect size and comfortable shape for cradling. I love her elegant minimal aesthetic, rendered here in these tiers with admiration.

IMG_6586.jpg

Italian meringue buttercream is probably, as we've been over before, the most annoying of all the buttercreams to make because it requires extra steps, precise temperature monitoring, and a long wait for cooling. But man, it is really worth it once in a while. If you've never made one before, set aside an hour or so and treat yourself to this incomparably silky treat.

Now, one of the important things in making IMB is allowing the meringue to cool to 80 degrees F before adding the butter. BUT! If you are impatient and mess it up, as I have done many times, you will end up with a horrific cottage-cheese like mess that seems irredeemable, but it's not. Just keep letting it cool and whip, and it will come together into its true silky smooth form. I used fresh blood orange juice in place of the water used for the sugar syrup here, giving the buttercream a mellow citrus flavor and a light pink color. You could definitely use any other citrus here if you preferred, just be sure to strain the juice well to remove the solids. Blood oranges are less acidic and more floral than regular oranges and yes, add more sweetness to the buttercream but I didn't adjust the sugar since I find that often IMB can use a bit more sweetness.

I don't recommend trying to make this buttercream without a stand mixer.  You may actually die from trying to hold a hand mixer for a freaking hour. Plus trying to pour in the syrup with the other hand...just, no.

Read the instructions a few times in advance and be prepared to act fast when your sugar syrup reaches soft ball stage (240 degrees)--higher temps will result in stiff syrup that doesn't incorporate properly. I love my ChefAlarm thermometer from Thermoworks. You can set an alarm to beep at a certain temp so you don't have to stand there watching it.

IMG_6541.jpg

BLOOD ORANGE ITALIAN MERINGUE BUTTERCREAM

5 large egg whites, cold

1 lb (4 sticks) unsalted butter, room temperature, cubed

6 oz and 2 oz granulated sugar, separated

1/4 c. fresh blood orange juice, strained

1/2 tsp fine sea or kosher salt

pinch cream of tartar

1/4 tsp. vanilla extract

Place egg whites in a stand mixer bowl with cream of tartar. Whip with whisk attachment on medium speed, no higher, to soft peaks. Add 2 oz of sugar and salt gradually, beat to stiff peaks then turn off mixer.

Heat juice and 6 oz of sugar over low heat until sugar is dissolved, stirring constantly, then raise the heat to medium and clip in thermometer. Bring to a low boil until temperature reaches 240 degrees F. As soon as thermometer hits 240, remove from heat, turn mixer on low, and slowly pour a syrup in a thin stream between the mixer bowl and the whisk; do not scrape bowl or whisk if unincorporated syrup remains. Beat on medium until meringue is fully incorporated. Place mixer bowl in the freezer or fridge to cool for about 15 minutes, or until mixture lowers to 90 degrees.

Return mixer bowl to stand and mix on low until temperature reaches 80 degrees F. Add soft butter, one piece at a time, waiting until each cube is fully incorporated before adding more. This process can take up to 25 minutes. Once all the butter is added, beat until mixture is smooth and fluffy. Add vanilla extract or other extracts as desired.

If mixture breaks and looks curdled, allow to cool further then keep mixing until mixture comes together

Screen Shot 2018-04-11 at 11.51.47 AM.png

I had been making a Chai cake recently using a homemade Chai extract, and that was pretty good, but the flavor didn't have quite enough depth. Following the time-tested rule of putting flavor as close to fat as possible for maximum power, I decided to steep the tea in my heavy cream and boy oh boy did that work. The cream carries incredible flavor to the finished cake and the tea payoff is incredible. I thinned the cream a bit with water just to make it looser and easier for the tea to absorb. 

I doubled this recipe so was using a full half cup of tea in this cream, which seemed like a hilariously large amount of tea to use for anything, and with the intensity of the results, I almost felt like it was too much! But the day after baking, the cake had mellowed a bit in flavor and it seemed exactly right.

IMG_6613.jpg

Spring is now melting away into summer, aka berry season. But it might not be until late summer when I'll be posting again, undoubtedly with some transformation of the season's treasures into some little art project, as I'll be in Europe soon to do some writing for a few months. Find me on Instagram to track my progress on my next adventure!

ASSAM CAKE

3 c. (350 g.) cake flour (White Lily)

3 1/4 tsp. (12 g.) aluminum-free baking powder

5 large egg whites

2 c. (400 g.) sugar

1  tsp. white vinegar

1 tsp. fine sea salt or kosher salt

1/4 c. loose Assam tea

1 1/4 c. heavy whipping cream

1/4 c. water

3/4 c. (155 g.) sour cream

2 Tbsp. vanilla extract or one vanilla bean, scraped

2/3 c. canola or vegetable oil

Preheat oven to 350 degrees F.

Whisk flours and baking powder together thoroughly in a large bowl and set aside.

Bring cream and water to a simmer over low heat in a small saucepan. Add the tea leaves and turn off the heat, allowing the tea to steep for about 15-20 minutes, stirring occasionally. Drain leaves from cream and allow the cream to cool in the fridge for another 15-20 minutes.

Beat egg whites, sugar, salt and vinegar for one minute (use a timer) on medium high until mixture is thick. Add sour cream to heavy cream and beat until smooth. Add cream mixture gradually to sugar mixture, then vanilla, and beat until smooth for 30 seconds.

Add oil to the flour mixture and beat until a dough forms. Add 1/3 of the cream mixture and beat until smooth and lump-free. Repeat with the remaining 2/3rds, scraping the bottom of the bowl and making sure no lumps remain.

Divide batter among three greased and floured 8" or 9" pans and tap on the counter to remove large air bubbles. Bake for 15-25 minutes until centers are fully set and spring back when pressed. Allow to cool for 15 minutes in the pan, then level, fill, and frost.

IMG_6625.jpg

Banana Cake with Hot Fudge Buttercream by Molly Brodak

IMG_5946.jpg

This cake hurts my feelings. I am upset that I have created this cake. 

This cake just shut the whole game down. Switch off the internet. Unplug the blog. It's all over now.

the night sky, but cake

the night sky, but cake

You know me by now, which means you know there is going to be some slightly (or not slightly) annoying/time consuming procedure that makes this chocolate frosting and this banana cake the best thing in the world and you're not wrong, genius reader. You're not wrong. 

But, my darling reader, you will be richly rewarded for your labor. Yes it takes an entire day to make this frosting, but look at how much hot fudge this recipe makes. LOOK.

THIS much hot fudge

THIS much hot fudge

You won't need all of it for the buttercream, so you can just jar the rest and keep it in the fridge, or give it to your friends if you hate personally enjoying hot fudge.

You have not had this hot fudge buttercream before, because I made it up. You have never had chocolate buttercream like this before. It tastes distinctly different from chocolate buttercream made with just cocoa powder or melted chocolate or both--it has a slight caramelized flavor to it from the hot chocolate (which cooks for upwards of 45 minutes). Its texture is richer than rich, smooth as silk and downright fatty. It's got this body to it, the kind of body you dream about: thick.

IMG_5932.jpg

So first we're going to make this vat of hot fudge. Then you're going to let it cool completely (preferably overnight) and then we'll add it to some whipped butter to make the buttercream. 

Now, look at my hot fudge recipe. Guess who is the star of the show? AGAIN?? That's right brilliant reader, my favorite baby, heavy cream. Heavy cream. As with caramel, any recipe for hot fudge that relies on evaporated milk is thumbs down into the center of the earth. It is just pure, rich cream that gives our hot fudge the fatty body it needs, no artificial thickeners or overly sweet cans of goo required.

Towards the end of the cooking process, the chocolate actually starts to separate, with visible chunks and an oily sheen in the mixture, and you will think it's all gone wrong. But this separation is exactly what we're going for, so don't worry. Once you whip in the butter the emulsion all comes together and you get that perfectly smooth, fatty mouthfeel only old-fashioned hot fudge sauce can provide. If you have an immersion blender, bust it out, as it is the ideal instrument for achieving the silkiest texture here.

It will go from upsetting liquids chocolate soup to a thicker glop then to oily mess then to PERFECTION.

This buttercream is not too sweet, so if you want it sweeter, feel free to add powdered sugar to your butter as you whip it up. Just a small amount, like a quarter cup, will add sweetness without adding grit.

HOT FUDGE SAUCE

3 c. heavy cream

1 3/4 c. (383 g.) granulated sugar

2 TBSP. corn syrup

4 oz. (115 g.) unsweetened chocolate, roughly chopped

1 1/2 tsp. kosher or sea salt

6 TBSP. unsalted butter, room temperature

1 tsp. vanilla extract

To make the buttercream you'll also need 2 cups (4 sticks) unsalted butter at room temperature and 1/4 c. powdered sugar (optional)

Stir together the cream, sugar, and corn syrup in a large heavy-bottomed saucepan over medium heat until the sugar is dissolved. Raise heat to medium high and bring to boil. Add the chopped chocolate and salt, stir. Reduce heat to low and simmer--you should have burbling in the center of the pot but not on the edges. Stir occasionally and let simmer for 45 to 50 minutes, until you see an oily sheen in the mixture and small solids separating out.

Turn off the heat and add the butter and vanilla, whisking vigorously or using your immersion blender. Let cool uncovered on the counter for at least thirty minutes, then cover with plastic wrap and transfer to the fridge to cool completely. Allow fudge to cool for at least four hours or overnight. Obviously, heat up your hot fudge sauce in the microwave (just a few seconds will do, be sure to stir well) before serving over ice cream or cake or just eating straight off the spoon.

TO make the buttercream, simply whip up your room temperature butter until light and fluffy, then add about half (two cups) of the cold hot fudge sauce. Add powdered sugar to taste if you like it sweeter.

my fatty glossy baby

my fatty glossy baby


Huh, I realize I took few photos of my banana cake, the actual...cake in this situation. Well, you can see where my priorities lie with this post and it is squarely with the hot fudge sauce. But I guess you do need some kind of cake to help chauffeur this buttercream to your mouth (or DO YOU??) so here's the banana cake part.

You'll need three very ripe bananas, not just spotty but very, upsettingly ripe. They should seem downright rotten. Allllll of the starch in these naners should be converted to sugar and their flavor should be super intense at this point. If you use only slightly overripe bananas you will end up with a drier, starchier cake with less flavor. 

a good amount of rot

a good amount of rot

A little bit of brown sugar is a nice pairing with banana flavor, as is the tenderness that acidic heavy cream and vinegar brings. You could definitely use buttermilk here if you wanted to, but actually I was looking to avoid that unique buttermilk flavor in this cake to allow the banana to shine, but feel free to make the swap. This cake is quite sweet in my opinion, so it goes well with a rich, not-too-sweet frosting like this chocolate one, but a slightly tangy one is great too, like this cream cheese frosting.

I'm all for layering natural flavors with their extract versions, so if you have some banana extract there is nothing wrong with adding a small amount here to really deepen the banana flavor, but this cake is sufficiently banana-y enough without it.

I covered the whole thing in dark chocolate ganache and used edible paint for the details

I covered the whole thing in dark chocolate ganache and used edible paint for the details

BANANA CAKE

2 c. (415 g.) granulated sugar

1/4 c. (45 g.) packed light or dark brown sugar

3 large, very ripe bananas

2 tsp. vanilla extract

1/4 tsp. banana extract

1 tsp. kosher or sea salt

3 large eggs, room temperature

1/2 c. heavy cream

1/2 tsp. apple cider vinegar

3/4 c. canola oil

2 2/3 c. (313 g.) cake flour (I use White Lily)

3/4 tsp. baking powder

3/4 tsp. baking soda

Preheat oven to 350 degrees F.

In a small bowl, whisk together the flour with the baking powder and baking soda and set aside. Add sugars, salt, and extracts to bananas in a large bowl and whip with a hand mixer until well incorporated and bananas are smooth. Add eggs and beat for two minutes until lightened. Add cream and vinegar and beat for one minute (this can be substituted for buttermilk if you prefer). Add oil and beat until incorporated. Finally, mix in 1/3 of the flour mixture on low until incorporated, then the rest of the flour; mix on low until batter is smooth.

Divide among three 8" or 9" pans, or spread into one 9x13" pan, and bake until center is just set, about 25-35 minutes. Cool completely, then frost.


It's a very light, tender and super moist cake, although very delicate and not easy to carve. I think the perfect thing to do with this guy is just throw it all in a 9x13 pan and frost when cool (some people call this "snack cake" but all cake is snack cake to me). It being January and our lives full of nighttime lately, I felt inspired to make a layer cake inspired by the night sky. I made a black dark chocolate ganache and some chocolate stars along with a big chocolate moon (which fell off the cake mid-shoot (you can see the crack in it where I repaired it in the candle photo). The night sky is wild and can't be held down, it reminded me.

For an extra sparkly nighttime, warm up your reserved hot fudge and serve it with the cake.

oh henlo darkness my ol fraind

oh henlo darkness my ol fraind

Yogurt Carrot Cake by Molly Brodak

Screen Shot 2017-12-14 at 8.31.32 AM.png

Welp, here we are. I was going to say something in this post about how excited I am to be on the Great American Baking Show, but, well. There's no point saying anything about it now, but that I feel sad about the whole thing. I think the situation speaks for itself and I just have to carry on with my life. So I carry me forward, forward into cake, as always.

And thank goodness it's carrot cake this time; there's something so homey and comforting about carrot cake--moist and fragrant, nicely balanced warming spices, such an excellent choice for a winter treat. Of course I had to rework the dusty old recipe into something super infallible--that's where the yogurt comes in.

face goes here

face goes here

Carrot cake is best when it's super rich and moist, and since it's going to have a lot of denseness already in it due to the carrots and nuts, there's no point in trying to make it light and fluffy--best to edge even further to the rich side of things, so yogurt is a perfect pairing here not only for the moisture it brings but the slight tanginess that compliments the earthy, mellow sweetness of carrots. I used my favorite Greek yogurt which I have on hand almost all the time, Fage, which is super rich and creamy and brings the perfect acidity to this cake to make it tender. A little bit of honey and a lot of brown sugar instead of white also help to keep the cake super moist.

Oh yes, I said carrots and toasted nuts--no raisins. I really debated on this, because I'm not against raisins per se, but I ultimately decided they just don't belong here. (One reason is that horrible moment when the raisins interact with the cream cheese frosting! My brain barfed just thinking about that.) They are a distraction. Save 'em for your crappy oatmeal raisin cookies.

You could use walnuts here but why would you do that to yourself

You could use walnuts here but why would you do that to yourself

So look, let's just let this be about carrots. Carrots are sweet and interestingly delicate and sufficient as cake inclusions, which is why I'm fully against sweeter show-stealers in carrot cake like pineapple and raisins and figs or whatever. Of course you can add these things to this recipe and it will be just fine, I mean, you don't have to listen to me. I'll just be here, silently judging your choices. Raw coconut gets the side eye. Chocolate chips get Beyond The Valley of the Side Eye.

I tried roasting carrots in various ways and adding them to the cake batter but these experiments resulted in a unpleasant Mush Packets instead of bits of flavor. The raw carrot gets a bit baked in the oven, just enough to release some flavor, so that's all the cooking it needs, I found.

I also tried two sizes of grated carrots--the regular (large) grated carrots and the finer grated carrots. As is almost always the rule in baking, the more time-consuming and annoying-to-make option is always the tastier option. The finer carrot shavings didn't sink to the bottom of the layers and gave the cakes a nicer, finer crumb with no disturbing long carrot strings to contend with. 

use the smaller grating holes and get ready to grate your life away

use the smaller grating holes and get ready to grate your life away

There's really nothing special about this cream cheese frosting recipe other than it is the BEST. I've tried all kinds of proportions of cream cheese to butter and have found the best is equal proportions. I've even tried making a Swiss meringue cream cheese butter cream but it was a disgusting nightmare I'd prefer to not talk about.

It's important to whip the butter and cream cheese together for a while to ensure there are no lumps of cream cheese, and I find the little lemon zest is really essential here too. Cream cheese buttercream is notoriously disobedient when it comes to holding a shape so it's best to just go rustic here with your icing technique if covering the whole cake in it.

CREAM CHEESE BUTTERCREAM

2 c. (4 sticks) unsalted butter, softened

2 c. (2 8 oz packages) full-fat cream cheese, softened

zest of half of a lemon

4 c. (440 g.) powdered sugar, or to taste

2 tsp. vanilla extract

1/2 tsp. kosher or sea salt

Whip butter, cream cheese, and lemon zest on high speed with a hand mixer or stand mixer until smooth and well-combined, add powdered sugar gradually then the salt and vanilla extract. 

I opted to double this recipe and cover my cake in white chocolate ganache then use a barrel-wrap technique to cover it in fondant. I also wanted to use this stencil from Evil Cake Genius I've been saving for the holiday season.

Screen Shot 2017-12-14 at 8.31.52 AM.png

It's so lovely! I stenciled on royal icing then dabbed on some gold luster accents hither and thither. I know the sugar roses and gardenias on top are not exactly seasonal but I thought they added a lightness to the look of the cake and worked with the organic, natural pattern of the stencil.

Serve this bb at your next gathering and you'll quickly uncover any Raisin Enthusiasts among the ranks bewailing your grape-less carrot cake--calmly explain to them you have a ball pit full of the wrinkled goobs out back and then lock the door behind them.

YOGURT CARROT CAKE

2 1/2 c. (320 g.) all-purpose flour

2 1/2 tsp. baking powder

1/4 tsp. baking soda

1 1/2 tsp. ground cinnamon

1 tsp. ground ginger

1/4 tsp. freshly grated nutmeg

1/4 tsp. ground cloves

A pinch freshly ground pepper

4 large eggs, room temperature

1 c. canola or vegetable oil

1 tsp. sea or kosher salt

1 c. (175 g.) packed dark brown sugar 

1/4 c. (50 g.) granulated sugar

1/4 c. (105 g.) honey

1 c. (260 g.) full-fat unsweetened Greek yogurt

1 tsp. vanilla extract

2 c. finely grated carrots (about 4 large)

1 c. toasted chopped pecans

Preheat oven to 350 degrees F. Grease and flour two eight or nine inch round pans, and line bottoms with parchment paper. 

Mix together all the dry ingredients--flour, baking soda, baking powder, and spices--with a whisk until combined and set aside. Mix together carrots and pecans in a separate bowl.

Using a hand mixer or stand mixer, beat the eggs, oil, salt and sugars on high speed for about four minutes until lightened, making sure no lumps of brown sugar remain. Add honey, yogurt, vanilla extract and beat two additional minutes until smooth. Mix in the dry mixture on low in two batches until just combined, then fold in the carrots and nuts. Divide among pans and bake for 25-35 minutes or until centers are set. Cool, fill, and frost. 

no wrinkled goobs here

no wrinkled goobs here

Lemon Pepper Cookies by Molly Brodak

IMG_5610.jpg

Good thing its gratitude season, because I've been feeling positively awash in things to be thankful for lately (not the least of which is winning an NEA fellowship for prose (!!?!?!!)). I've also been thinking a lot about how lucky I am to do meaningful work as a teacher. I know not everyone looks forward to getting to work every morning like I do. 

On top of that, I get to live in Atlanta. I don't know what it is exactly, maybe just that romantic slant of light in the fall, maybe the sentimentalism of the first touch of those seasonal mean reds, but I've been deeply extra in love with my city lately. So I thought my Thanksgiving treats this year ought to pay homage to The A, my vibrant, beautifully diverse and thriving adopted hometown--and nothing could be more perfect than to represent Atlanta's signature lemon pepper wings with a lemon pepper cookie.

Oh, and to put Killer Mike, true Atlanta native, on that lemon pepper cookie. Boosh.

we got to see Run the Jewels at the Hawk's home opener a few weeks back and it was lit

we got to see Run the Jewels at the Hawk's home opener a few weeks back and it was lit

This cookie is made extra rich and buttery with cultured butter. You can get some great European cultured butters out there but one of the best stateside is Vermont Creamery's cultured butter, which is pretty easy to find at the grocery store. I love the slightly buttermilky tang and incredible richness of this butter. To adjust for the extra fat in this type of butter, a touch of cornstarch is added to the cookies, which also makes the crumb a bit finer and the texture silkier. I really love a cut-out cookie that is not too hard, not too soft, and keeps its sharp edges--this recipe hits all of those notes expertly.

Citric acid is key for a bit of bite to your lemon bakes, so it is definitely worth seeking out (you can often find it in the canning/preserving section at the grocery store). You'll never be able to achieve that true citrusy tang with lemon rind alone (discussed previously in this lemony treat and that lemony treat). Pepper balances out the bright lemon with an earthy bite and elevates this cookie to glory. If you're not up for royal icing decorations, might I suggest smearing some strawberry ice cream between two of these babies and freezing up some incomparably tasty ice cream sandwiches, or drizzling with white chocolate.

The cream cheese in this dough helps make that perfectly soft but rich texture and prevents the cookies from spreading too much. Unlike when you are creaming butter and sugar for cakes or other applications, you don't want to whip too much air into cookies meant for cut-out shapes. About half the time (4 minutes instead of 8 minutes for a full creaming) is sufficient, as any more can lead to distortion in your cookies as they bake up.  A full description of my rolling-out method can be found here. Honestly, one of my favorite ways of dealing with cut out cookies is to just slice up a sheet of frozen dough with a pizza wheel--less stress and no scraps.

I also made one with Chan Marshall/Cat Power, another Atlanta native I love dearly

I also made one with Chan Marshall/Cat Power, another Atlanta native I love dearly


This recipe makes, I don't know, a buttload of cookies, so feel free to halve it if you would prefer. But really, this is such fantastic cookie dough to freeze and have on hand for when you need a little something special so I recommend making the full amount. Do like I do and cut out a bunch of basic squares or rounds and store them in a Tupperware container in the freezer so they are ready to bake whenever the mood strikes.

Oh and here’s my basic royal icing recipe if you want to get piping:

ROYAL ICING

White vinegar, for wiping bowl

1/4 c. warm water

3 tsp. pasteurized powdered egg whites

1 drop almond extract

1/2 tsp. vanilla extract

1 tsp. light corn syrup

3 c. powdered sugar

Use a paper towel soaked with a little white vinegar to wipe out your bowl and beaters. Place warm water in the bowl, then sift egg whites over the water. Allow to sit for five minutes, then mix on low with a hand mixer until powder is evenly distributed and no large lumps remain. Then increase the speed to medium and beat to foamy soft peaks, add extracts and corn syrup, then slowly add powdered sugar 1/4 cup at a time. Beat until stiff and smooth. Use a tiny amount of water to thin icing to desired consistency. Cover bowl with wet dishtowel and allow to sit for ten minutes or more to allow bubbles to dissipate. Store covered or in piping bags.

freshly ground pepper is miles away from the pre-ground dust

freshly ground pepper is miles away from the pre-ground dust

LEMON PEPPER COOKIES

8 oz. cream cheese, softened to room temperature

2 c. (4 sticks) cultured butter, softened to room temperature

zest of two lemons

1 tsp. freshly ground black pepper

450 g. granulated sugar

1 tsp. salt

1/8 tsp. citric acid

2 egg yolks, room temperature

1 tsp. vanilla

800 g. all-purpose bleached flour

1 tsp. baking powder

Whisk together the flour, cornstarch and baking powder thoroughly in a bowl and set aside. Cream the butter, sugar, cream cheese, lemon zest, pepper, citric acid, and salt in a stand mixer with paddle attachment or in a large bowl with your hand mixer for about 4-5 minutes. Be sure no lumps of cream cheese remain. Add the yolks and vanilla and mix for another minute. Add the flour mixture in two batches and mix until just barely incorporated. Remove dough ball from bowl and knead a few times in your hands to make sure the flour is fully incorporated. Divide into three discs, wrap in plastic wrap, and chill/rest dough in the fridge for about 20 minutes. Roll each disc onto a between two sheets of wax paper into a 1/4" rectangle that will fit your cookie sheets. Cover each dough sheet with plastic wrap and place on cookie sheet, then place cookie sheet into freezer. 

Chill for at least an hour, but can be left in the freezer for up to 3 months in sheets. When you're ready to bake, preheat your oven to 350 degrees F. Remove sheets from freezer, cut shapes directly from frozen dough sheets, and bake frozen shapes immediately on cold or room temperature cookie sheets lined with parchment paper. If shapes become soft as you work with them, be sure to refreeze before baking. Bake for 8-12 minutes. They will puff slightly but then shrink back down to their proper shapes. Cookies will not brown much due to the cream cheese, so barely golden bottoms and set centers are the best indicator of doneness.

Allow to cool completely, then frost if desired and gobble.

bite.jpg

Browned Butter Pecan Cake with Orange Caramel Buttercream by Molly Brodak

main0.JPG

Under autumn's avalanche of spiced sepia-tone-pumpkin-chunky-knit-apple-picking razzmatazz is a favorite cool-weather memory of mine that doesn't quite fit the script. It's a color memory: looking up at the bright blue sky through feathery sun-yellow leaves. I think there was a stand of maple trees that turned vivid yellow for a short while in the fall near where I used to live in Michigan. But recently I found this gingko leaf veiner in my drawer of gumpaste flower stuff so I dreamed up this cake based around the butterfly-like yellow gingko leaves. Someday I'll start some tutorials on how I make my sugar leaves and flowers...

Screen Shot 2017-10-20 at 9.01.57 AM.png

This cake is a monument to my favorite comfort flavors. The earthy browned butter and toasty pecans ground the bright/tart flavors of orange caramel--the whole thing works together like a gorgeous flavor machine designed for palate-slaying bliss. Or something.

Screen Shot 2017-10-19 at 6.31.01 PM.png

Anyway here's the deal, there are a lot of fiddly little steps to this one but I am straight up and down telling you they are worth it and don't be intimidated. And don't burn your damn nuts. Watch those guys. They are expensive!

This cake is covered in vivid sky-blue white chocolate ganache (just add food coloring to your heavy cream, then make the ganache as normal) with some palette knifed-on clouds made with white chocolate ganache. Of course you can just cover the whole thing in delicious orange caramel buttercream instead.

Smearing on clouds is super fun

Smearing on clouds is super fun

I got the idea for this buttercream from my pal Hector when I tried one of his macarons that was filled with a similar orange caramel buttercream. My first attempts at orange caramel weren't satisfyingly orangey enough because they relied just on orange juice so I messed with the composition to up the flavor. So let's start with the caramel. If you stop here and just make the caramel I will 100% forgive you, because this stuff is absolute gold and you don't even need a cake to pour it on--just dip apples in it, drizzle it on ice cream, or just eat it with a dang spoon as I myself did as soon as it was cool.

This will make twice as much as you need for the buttercream, so the rest would be great to use as a drip/drizzle over the finished cake.

Caramel is all about timing. You want to let your sugar get a bit dark so your caramel will have a slight bittersweetness to it, but you don't want to burn it. I say err on the side, though, of dark instead of light. Too light and there is no flavor at all, just sweetness. Remember, you're adding cream to this caramel so it will end up lighter than it looks in the pan.

Screen Shot 2017-10-19 at 6.04.16 PM.png

ORANGE CARAMEL SAUCE

One large orange, juiced and zested

1/3 c. water

1 1/2 c. (305 g.) sugar

2 TBSP. (25 g.) corn syrup

2 TBSP. unsalted butter

About 3/4 c. heavy cream

1 tsp. kosher or sea salt

Strain orange juice into a cup measure, and fill the rest with cream to make a full cup (usually you get about 1/4 cup of juice from a large orange). Add this, along with the orange zest, to a small saucepan and allow to gently simmer on low heat while you make your caramel. In a larger saucepan, pour the water in and then add the sugar and corn syrup to the center of the pan, avoiding the sides. Stir gently so the mixture is even, and allow to boil over medium high heat. Make sure you have a large metal fine mesh sifter/strainer ready. As the sugar caramelizes, swirl or stir it so the browning is even, and pull it from the heat as soon as the mixture is a deep mahogany color. Strain the orange cream mixture into the caramel--be careful, it will steam and bubble up. Mix thorough and return to low heat. Add butter and mix until melted. Stir in salt and transfer to a heatproof bowl and allow to cool at room temperature.

To make the orange caramel buttercream, simply whip up 2 cups (4 sticks) of softened unsalted butter with about a cup (to taste) of powdered sugar and add about half of this caramel. I whipped some in and then folded the rest in so there would be lovely delicious streaks of caramel running through the buttercream. 

Next, this cake! I made, oh I don't know, at least 15 different iterations of this cake until I landed on a texture/flavor I liked. Mostly I was messing with eggs and egg yolks and flour proportions. You see, whole eggs add structure but the whites tend to dry cakes out, while yolks add velvet moistness but too many can lead to a dense, heavy cake. On top of that, you have your pecans, which are going to weigh your rise down, so all of this had to be maddeningly calibrated just so with a jillion test cakes. You're welcome.

If you've never browned butter before, first of all who are you, and second of all don't worry it's super easy. You just cook the butter until it is browned--but watch it carefully....like caramel, nothing happens for a long time and then suddenly everything browns very quickly. I've noticed the bubbling sound of the butter dies down as it starts to brown (the water is all evaporated at that point so less bubbling sounds?) so that's a good cue you are getting close. Sometimes the foam on top makes it hard to see what's going on with the bottom of the pan, so feel free to stir as it starts to brown so you don't let it burn. 

bae

bae

This is such an incredibly flavorful cake. Browned butter just adds and extra nutty oomph to the toasty pecans and the texture is dense and rich. It's really great just on its own, without frosting, if you're into that kind of thing. Now, I like just a drop of natural butter flavor added to this cake for a true butter pecan flavor, but it is optional (this one is great). If you layer your extracts with subtlety the flavor can be wonderful (not artificial tasting). This makes enough for two 8" pans but you can double this easily for a lovely tall cake, which I recommend. 

BROWNED BUTTER PECAN CAKE

10 TBSP. salted butter

300 g. sugar

1 tsp. fine kosher or sea salt

1/2 c. heavy cream

3 large egg yolks, room temperature

2 large eggs, room temperature

1 tsp. vanilla extract

1/4 tsp. natural butter extract

150 g. cake flour (I use White Lily)

50 g. all-purpose flour (I use Gold Medal AP)

1 1/2 tsp. baking powder

1 c. toasted pecans, chopped finely (or use pecan chips)

Prepare pans by greasing and flouring sides and lining bottoms with parchment. Toast pecans and set aside to cool. Sift flours and baking powder into a small bowl. I know sifting is annoying but you really have to do it for this recipe--do not just stir with a whisk. Add sugar and salt to a large bowl, set aside. In a large saucepan, add the butter and cook over medium heat until butter browns. Remove from heat and pour over sugar and salt, scraping the saucepan to get all the delicious browned butter solids. Use a hand mixer to whip for about one minute, then add cream and mix until fully incorporated. Place this mixture in the freezer for about 10 minutes or until room temperature/cool (do not allow to freeze).

Remove from freezer and continue to whip the butter and sugar mixture until thick, light and fluffy, for about 4 minutes. Add yolks, one at a time, then the eggs and the extracts, beating until the mixture is light and fluffy. This should take about 10 minutes total. Add flour in two batches, mixing on the lowest speed until just incorporated. Fold in pecans. Divide evenly among pans and bake for about 18--22 minutes or until center springs back when touched. Trim cakes, then fill and frost.